Pouring Collodion

Pouring Collodion
Handle your collodion gently. Don't shake it, and pour it gently and slowly. Don't try to get the last drops out of the bottom of the bottle. Precipitates that form when the salted collodion is mixed settle to the bottom of the bottle and using the dredges will lift these particles back into suspension and result in pinholes throughout your image. Now that the warnings are out of the way...
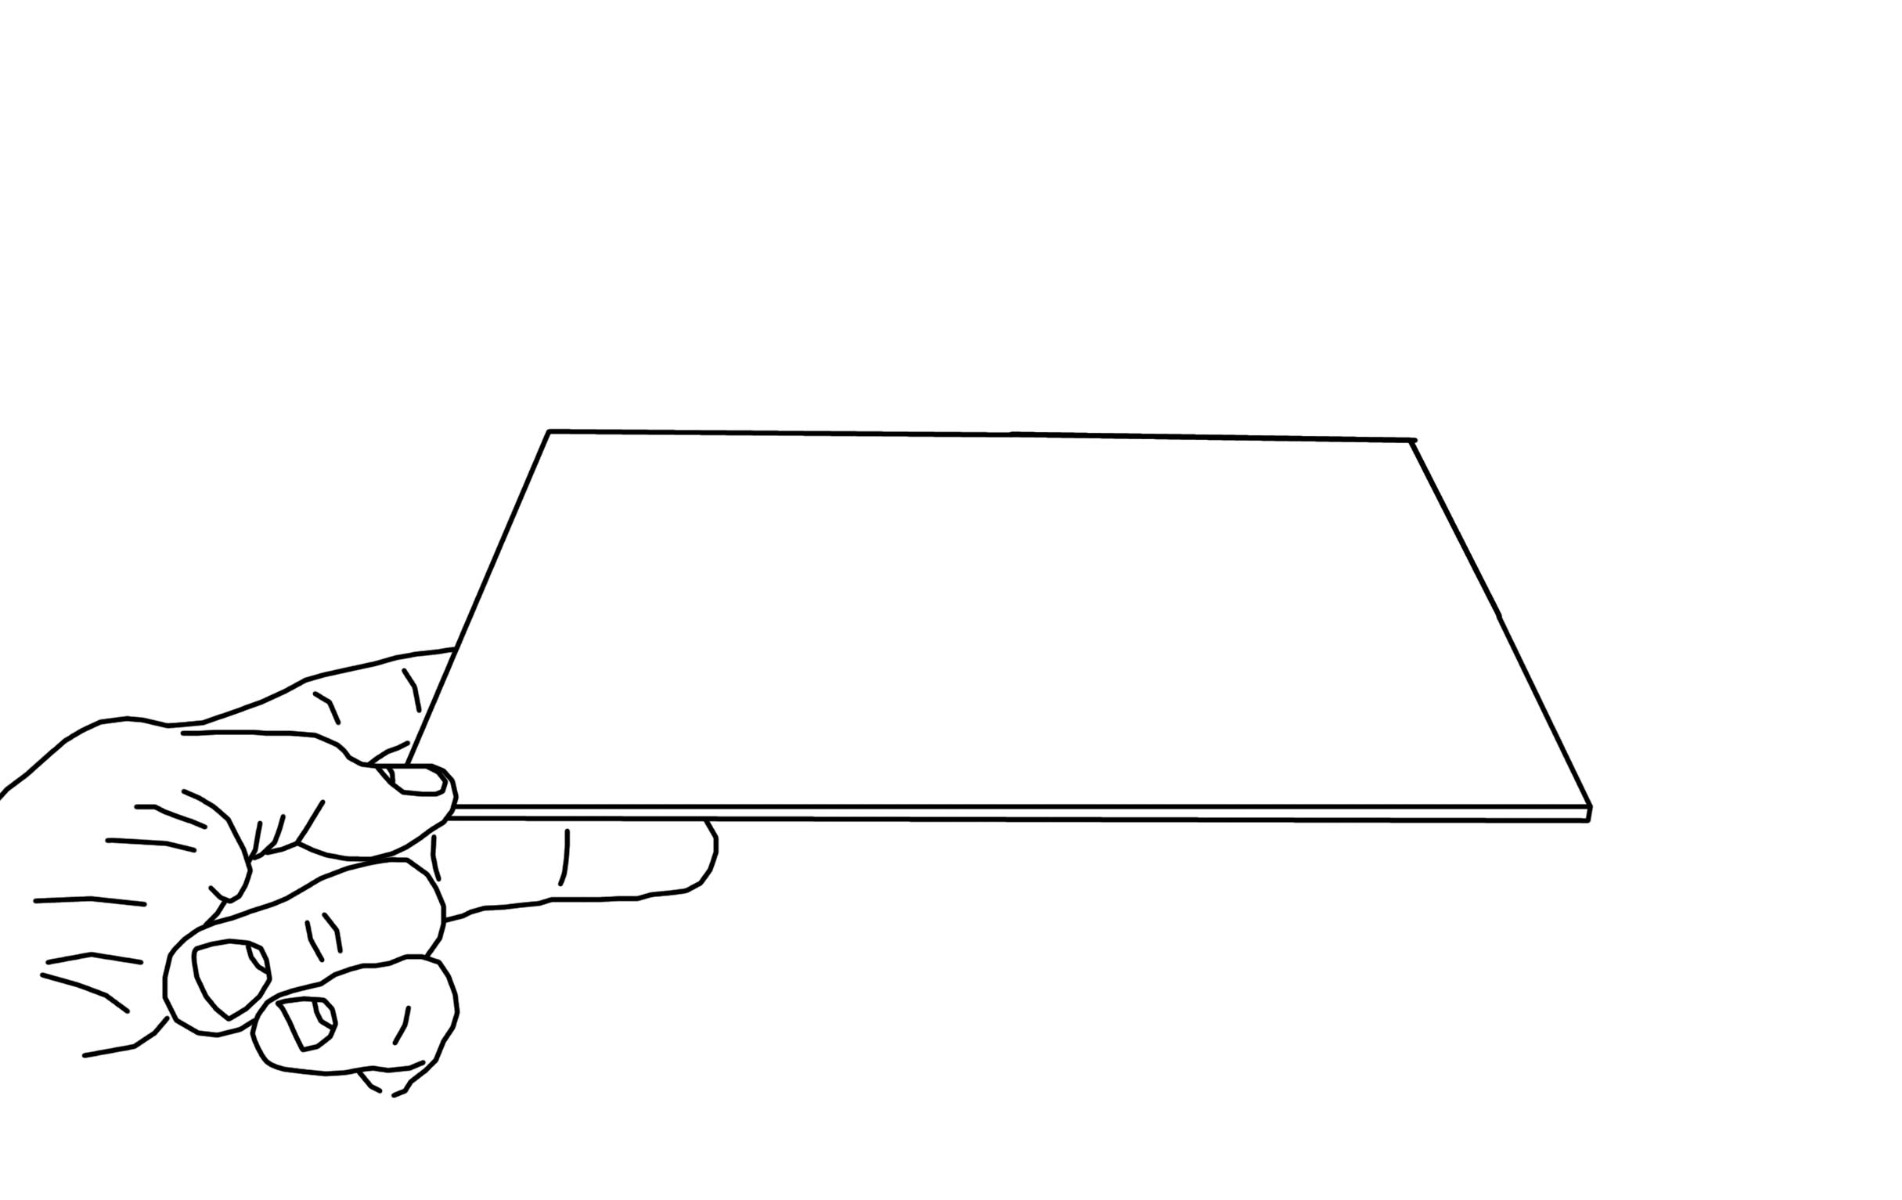
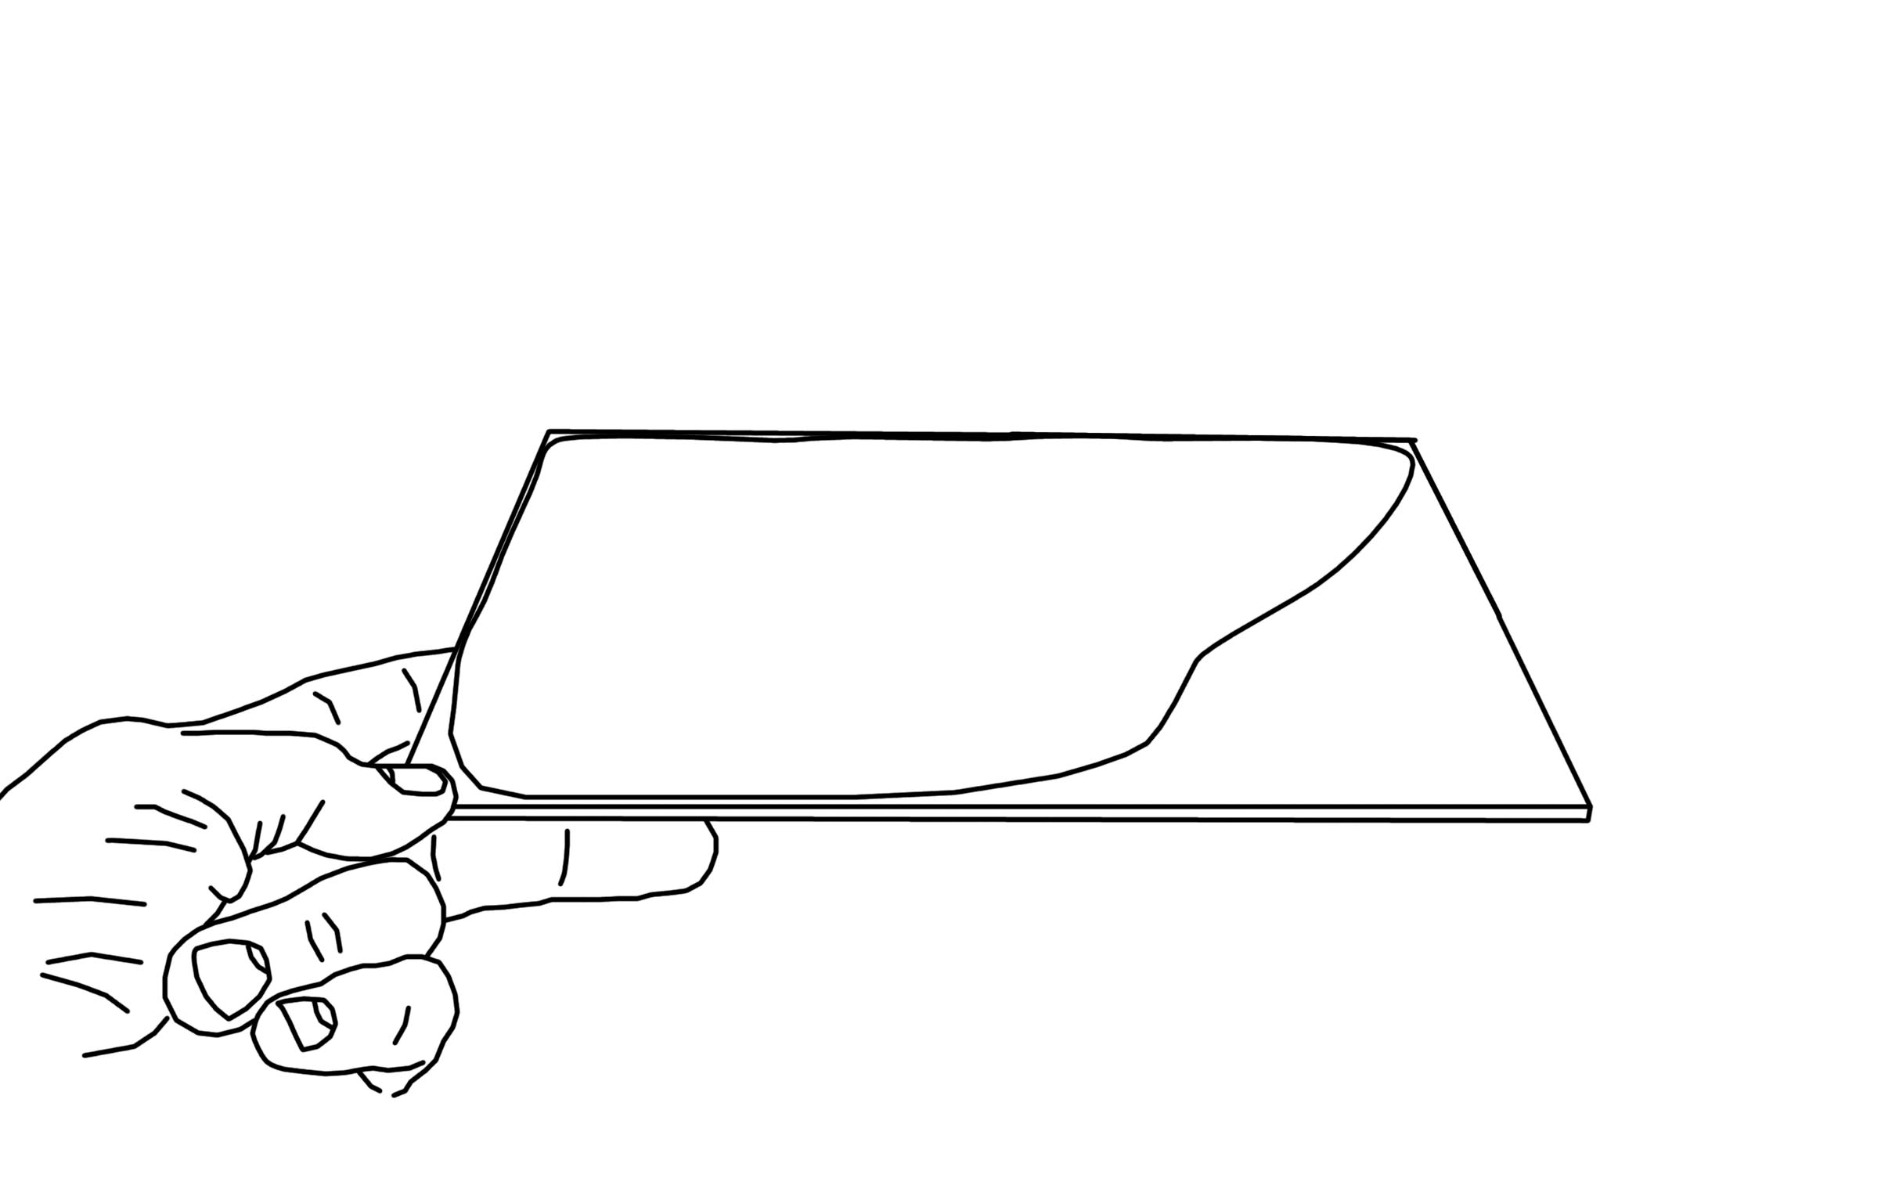
To coat the plate, hold it from beneath on the tips of your fingers, like a waiter holding a tray.
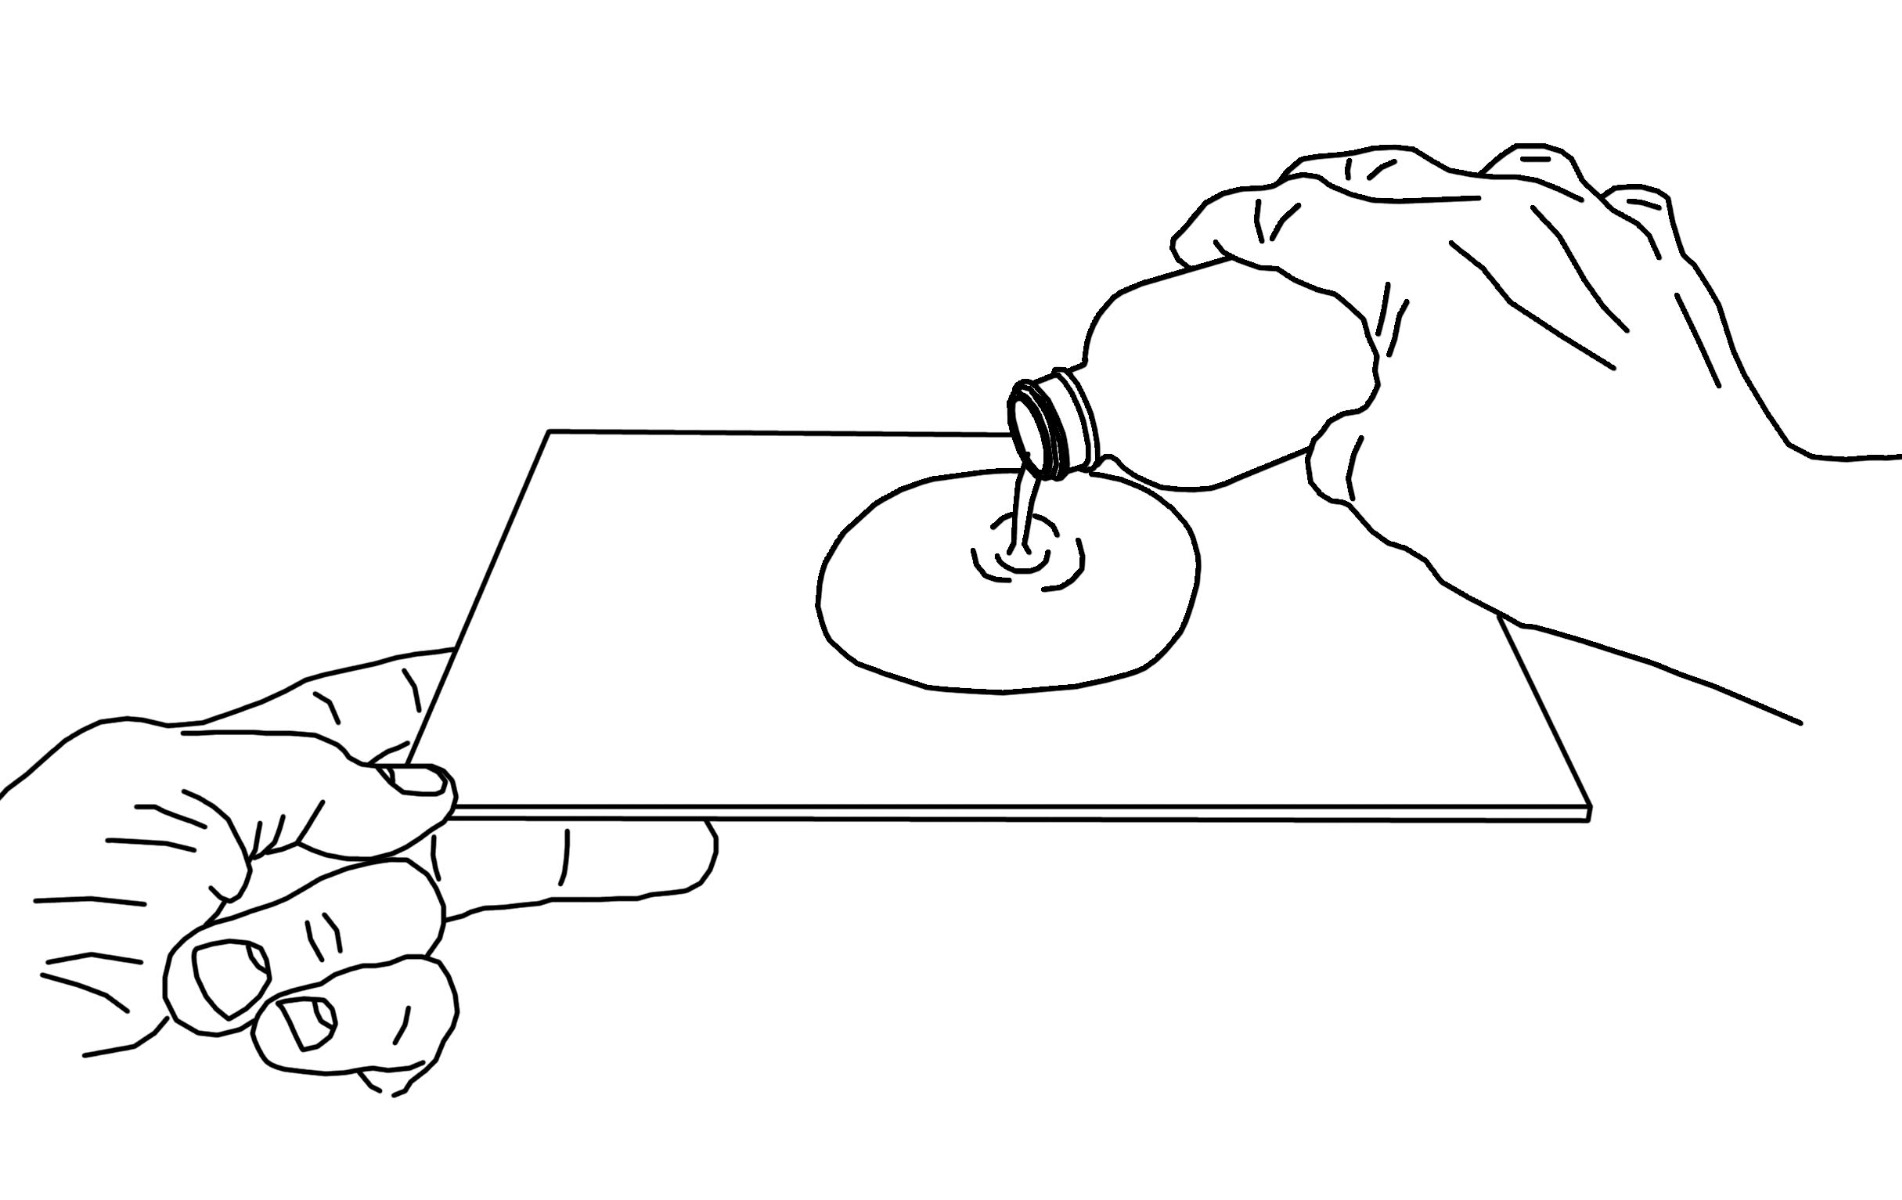
Hold the plate precisely level. Pour the collodion slowly but steadily onto the center of the plate. As you pour the collodion, it will form a circular pool in the middle of the plate. Adjust the tilt of the plate as necessary to maintain the circular shape until enough collodion has been poured to amply cover the plate. Remember, work slowly and methodically. You have more time to coat the plate than you think, so take your time. You will also need to pour more collodion onto the plate than you think you'll need, so be generous. Remember, you can always drain off any excess after the plate is coated.
When flowing the collodion over the plate, plan ahead. It doesn't matter whether you move it in a clockwise or counterclockwise direction, or from which corner you pour back into the bottle. As long as you work in a consistent fashion, you'll be okay. For the sake of illustration, let's assume we are holding the plate with the left hand. We'll begin by flowing the collodion into the near left corner, then move clockwise from there to the far left, then the far right, finally pouring off into the collodion bottle at the near right corner. When I mention tipping the plate, don't physically tip the plate as much as "think" about tipping the glass. It doesn't take much!
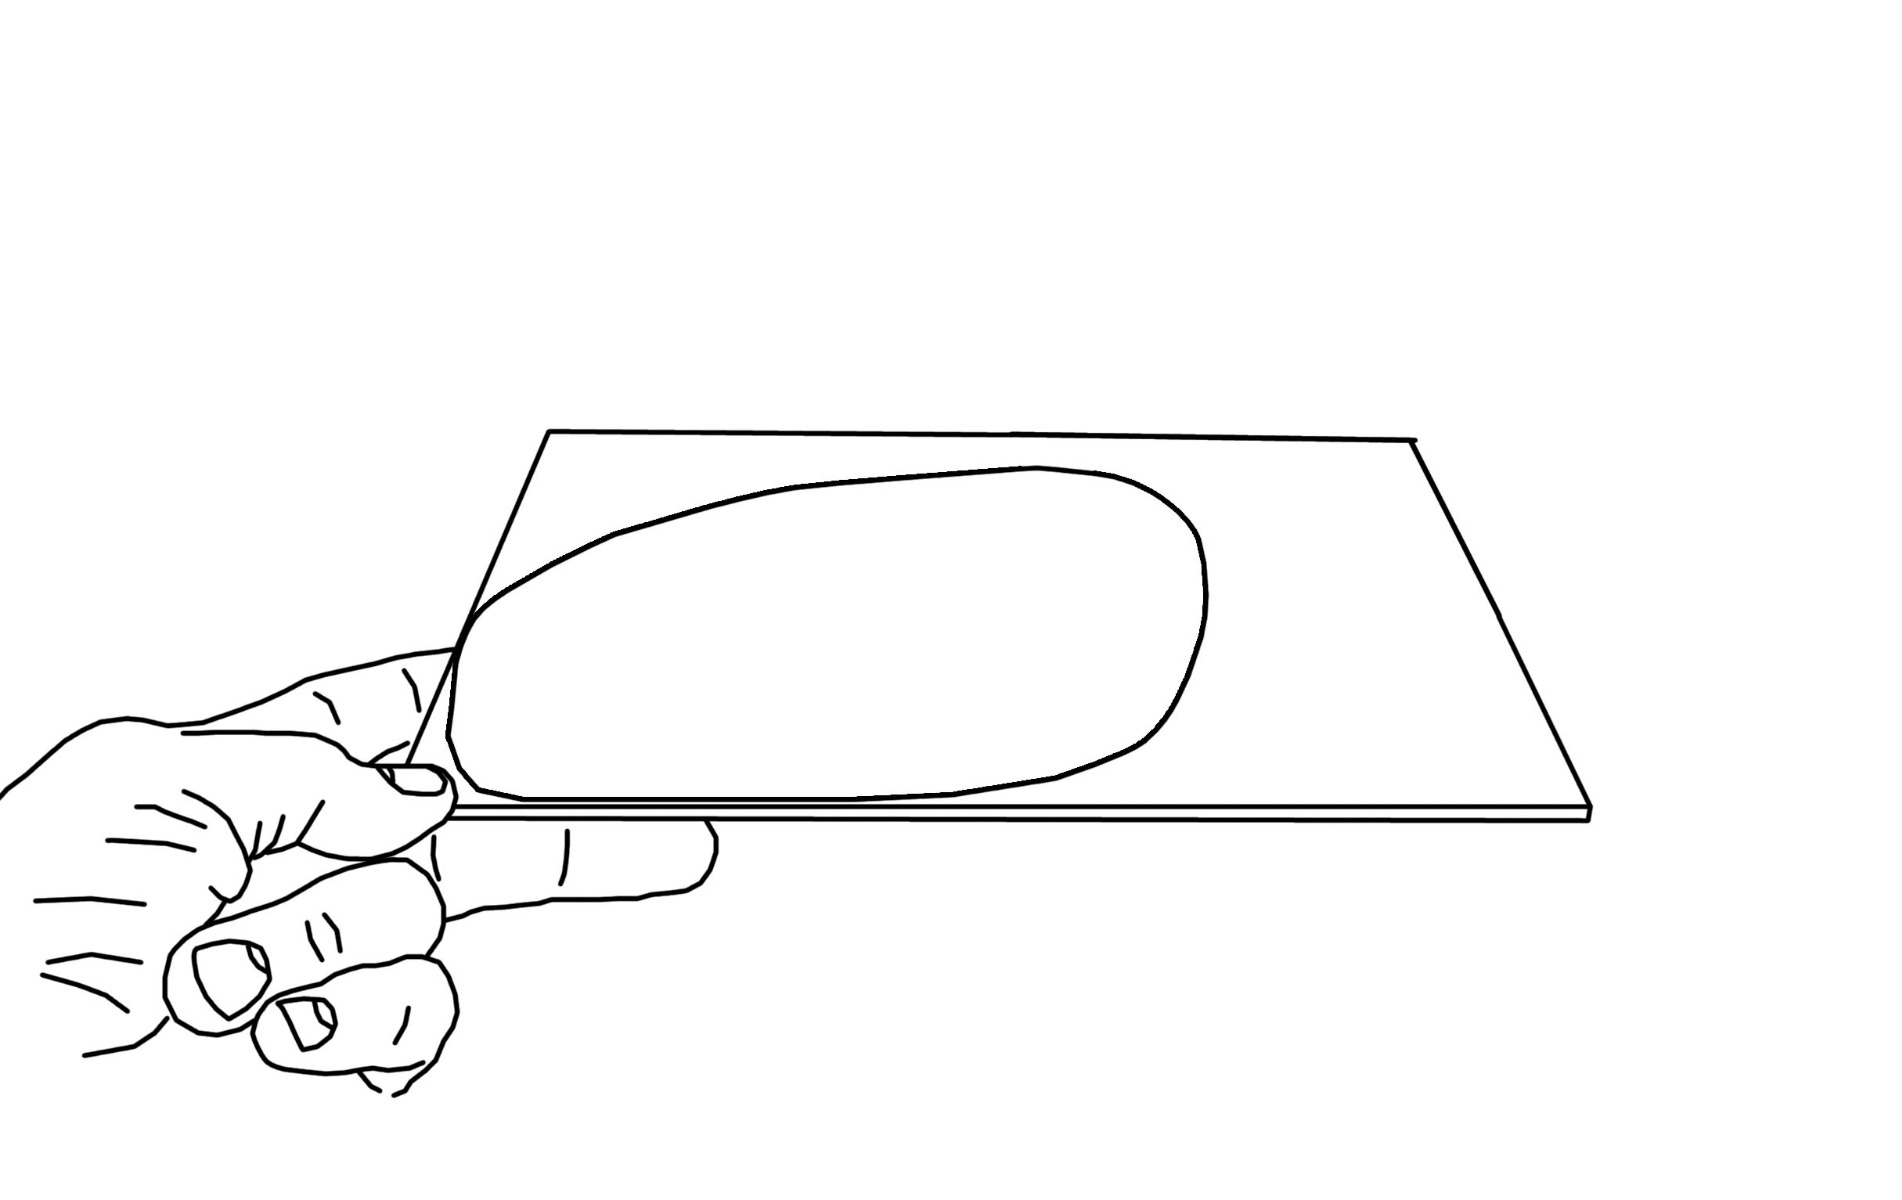
Here we go: Once enough collodion has been poured onto the plate, gently tip the glass toward the left and a little bit toward you. The collodion will gradually begin to flow to the near left corner.
 |
 |
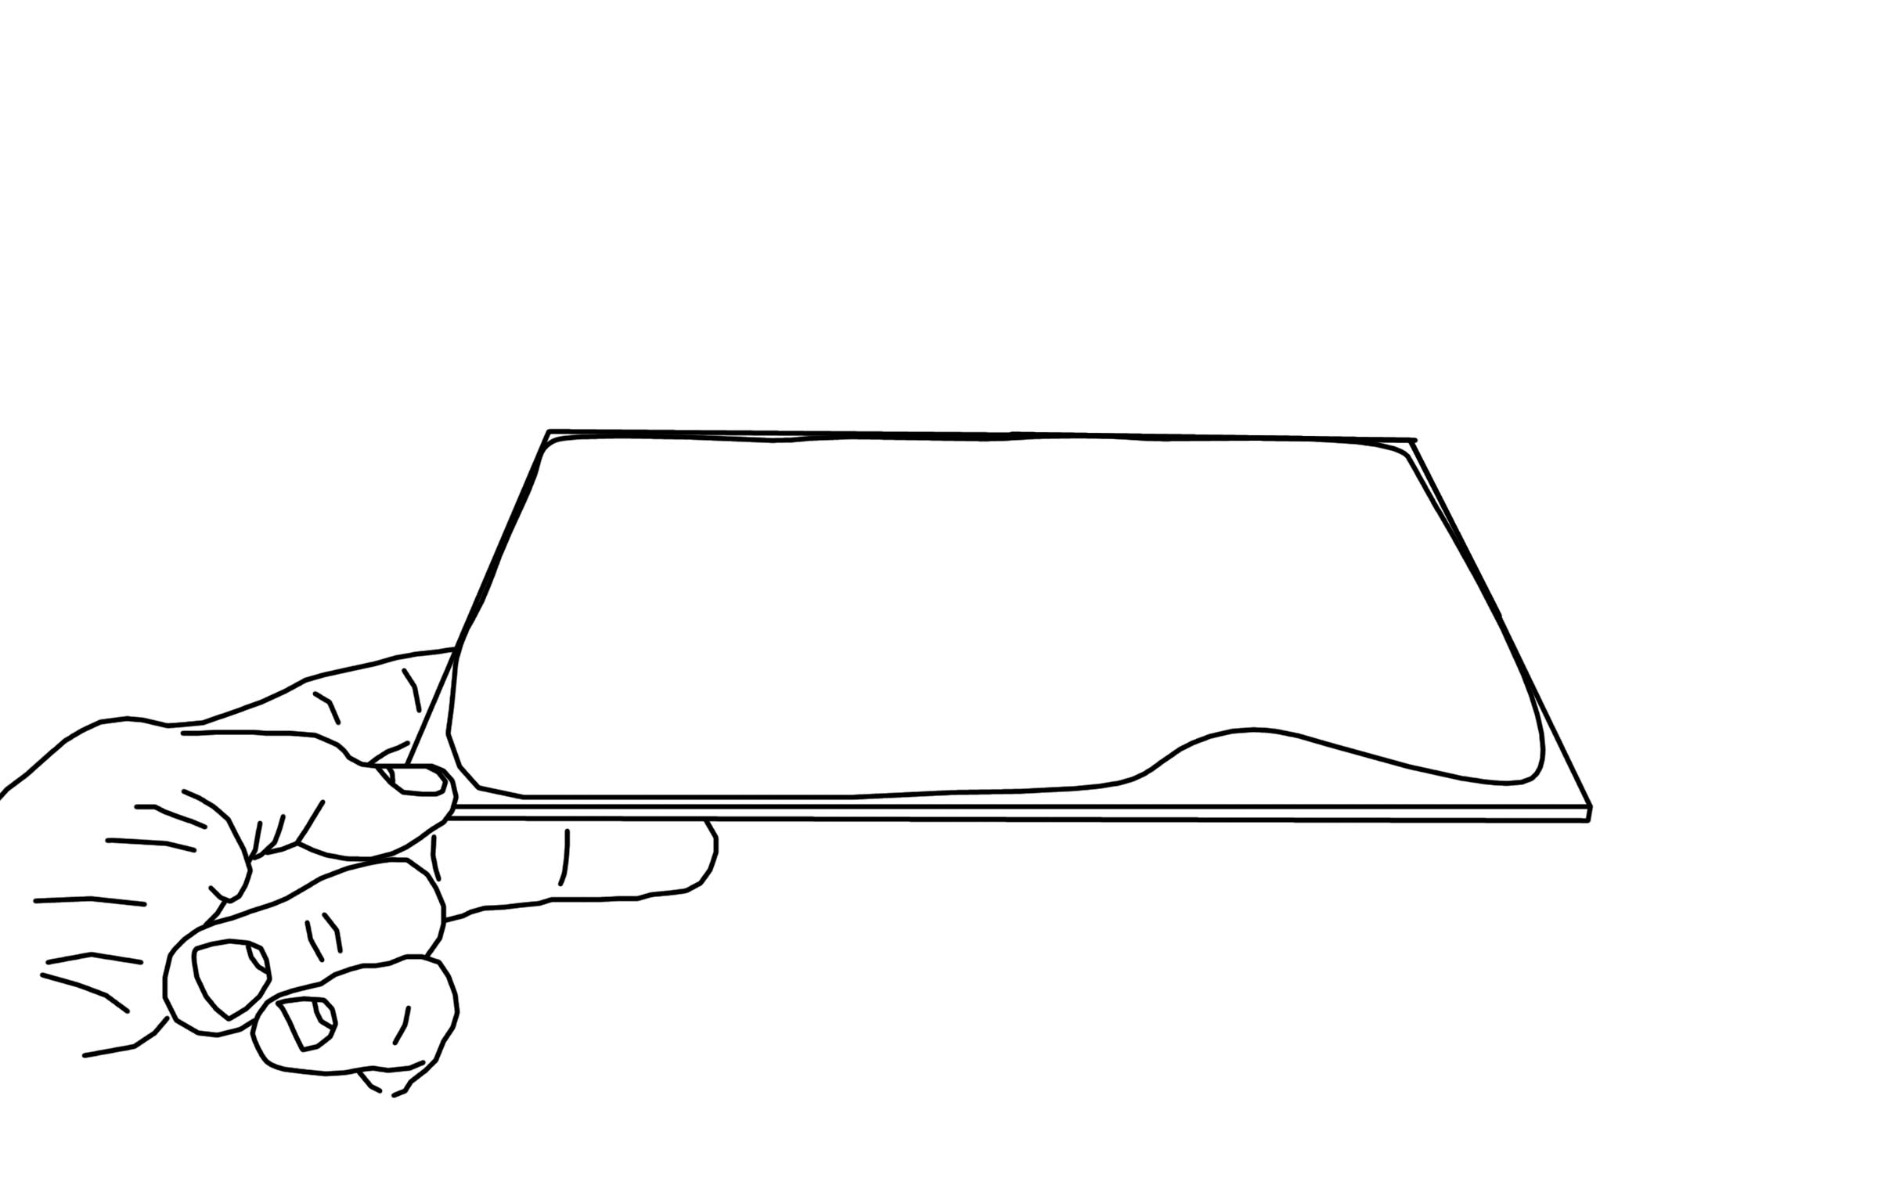
As it approaches the edge of the glass gently tip the plate away from you until the collodion approaches the far left corner.
 |
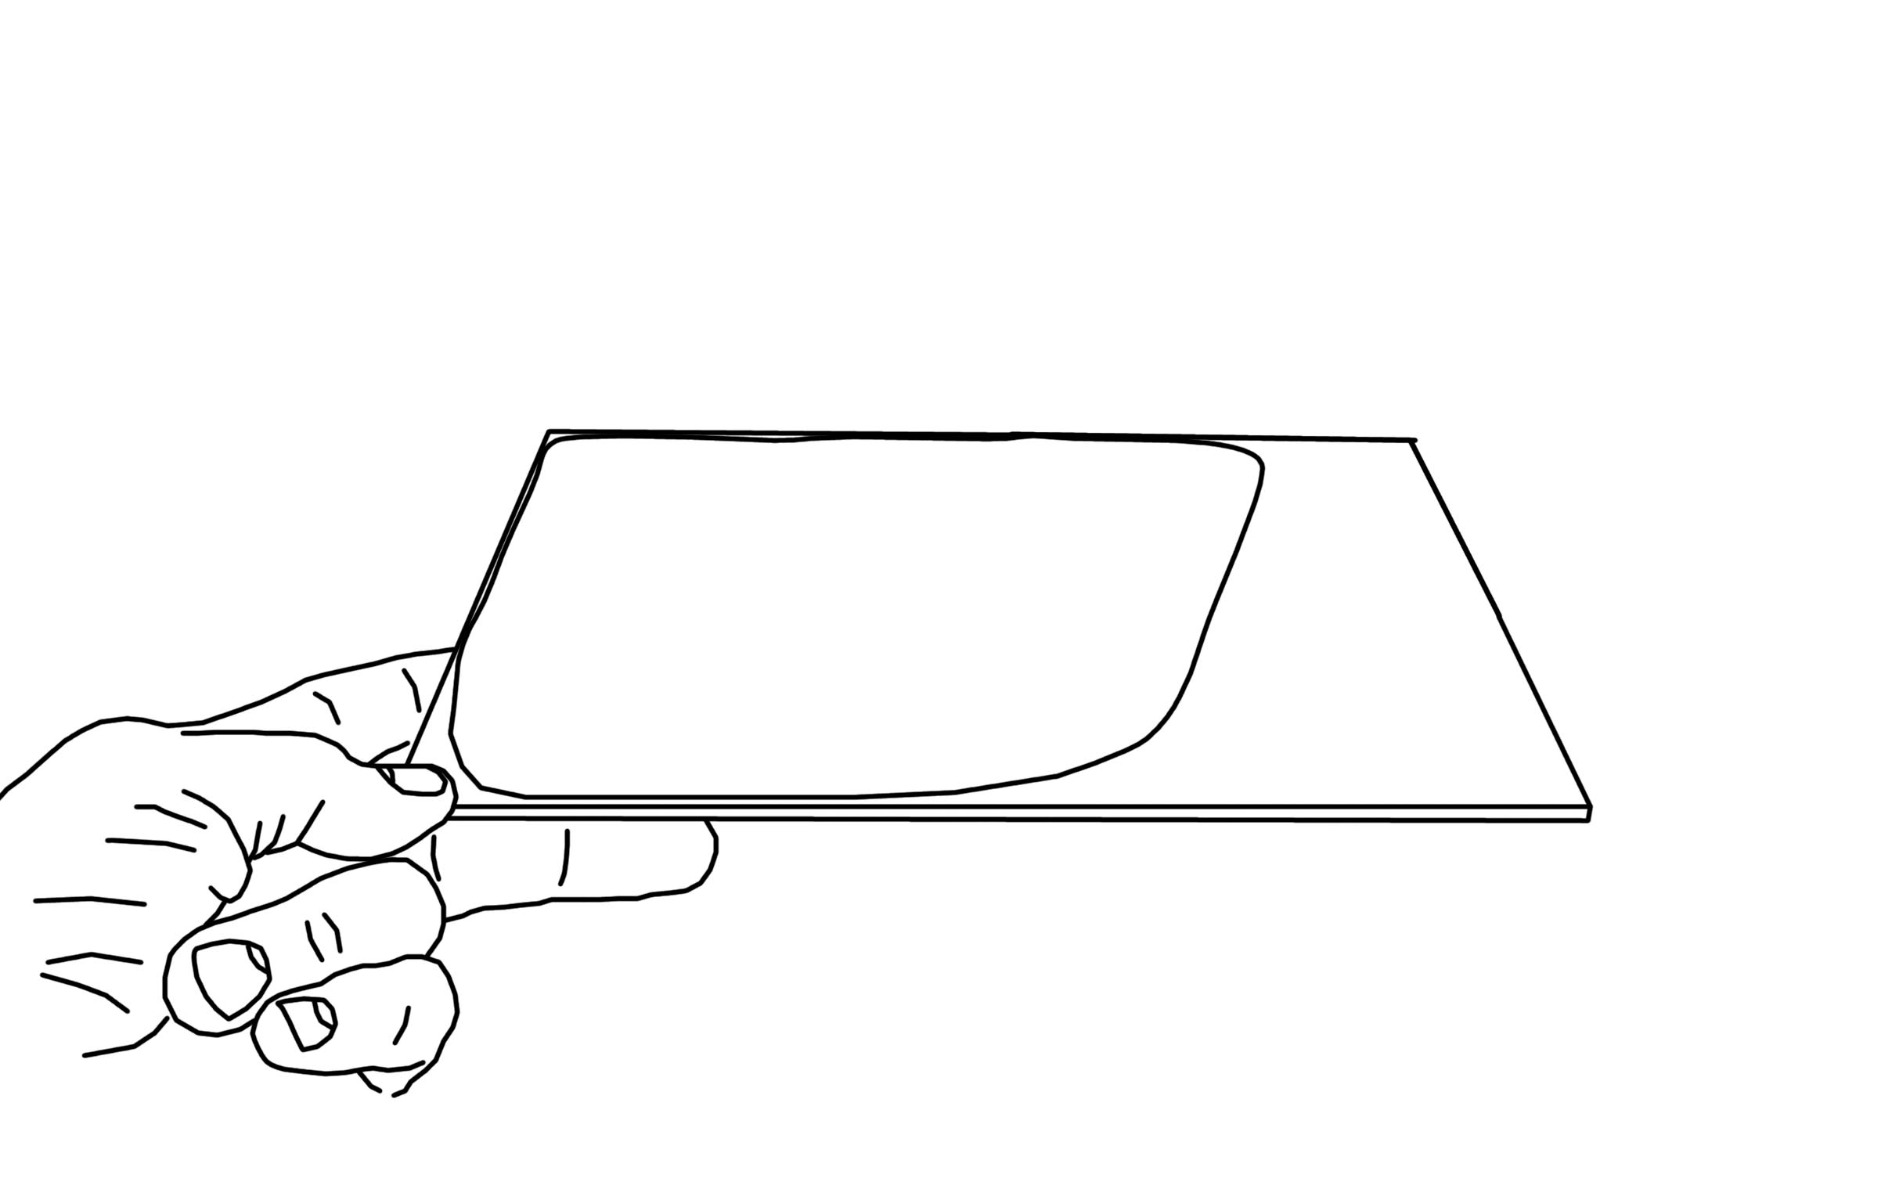 |
Then gently tip the glass to right so the collodion moves into the far right corner.
 |
 |
And finally tip the plate toward you slightly to drain the excess collodion off the corner of the plate and back into your collodion bottle. Don't hurry the collodion or try to force it back into the bottle. This will usually result in spills off the edge of the plate. Just keep everything flowing at a constant rate and you'll be a pro in no time.
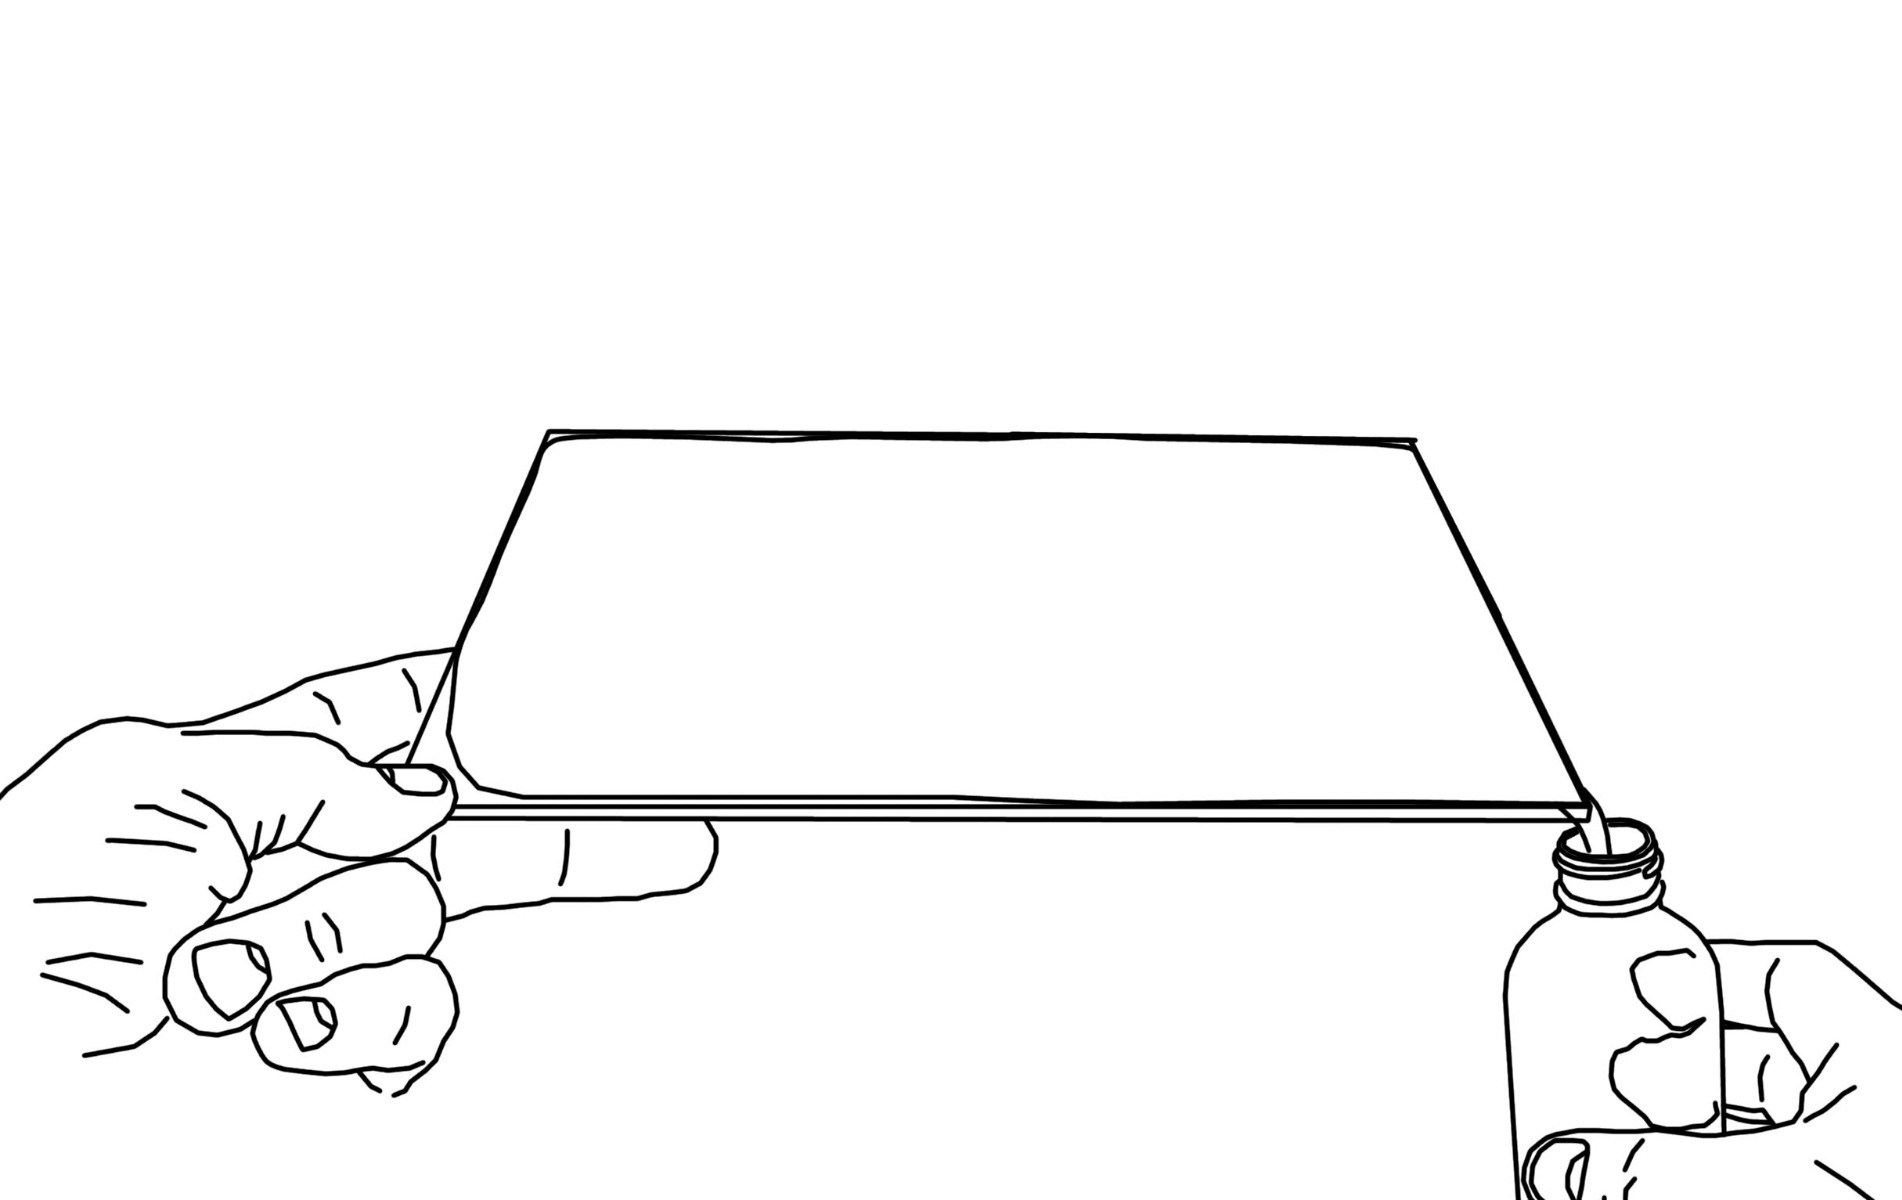 |
Some general precautions when flowing the plate: Always keep the collodion moving outward from the center pour. Don't try to tip the plate backwards to "coat a spot you might have missed". This will inevitably leave a thick ridge as it builds up on the collodion that has already dried to some extent. Once you begin draining the collodion back into the bottle, begin rocking the plate from side to side to prevent ripples from forming on the surface of the collodion. (These ripples are called crepe lines and will show up in your image later if you don't take care of them now!)
When the collodion stops draining from the plate, raise the plate and cap the bottle. Continue rocking the plate slowly from landscape orientation to portrait orientation (about 1 or 2 seconds per rotation) while always keeping the draining point at the bottom. Continue rocking until the collodion skins over. You can tell when it's ready by gently touching the collodion at the draining corner, when your finger leaves a dent without feeling wet or slippery, it's ready for the silver bath.