Development, Exposure, and Contrast
Over the years since silver halide photography was first discovered, photographers have identified a handful of relationships between exposure, development, and image contrast that have become constants of the silver halide process. These relationships originate from the chemical and physical processes responsible for converting silver halides into image forming silver metal. As a result, they hold true no matter what form of silver process is being used; be it wet plate collodion, or silver gelatine film.
|
|
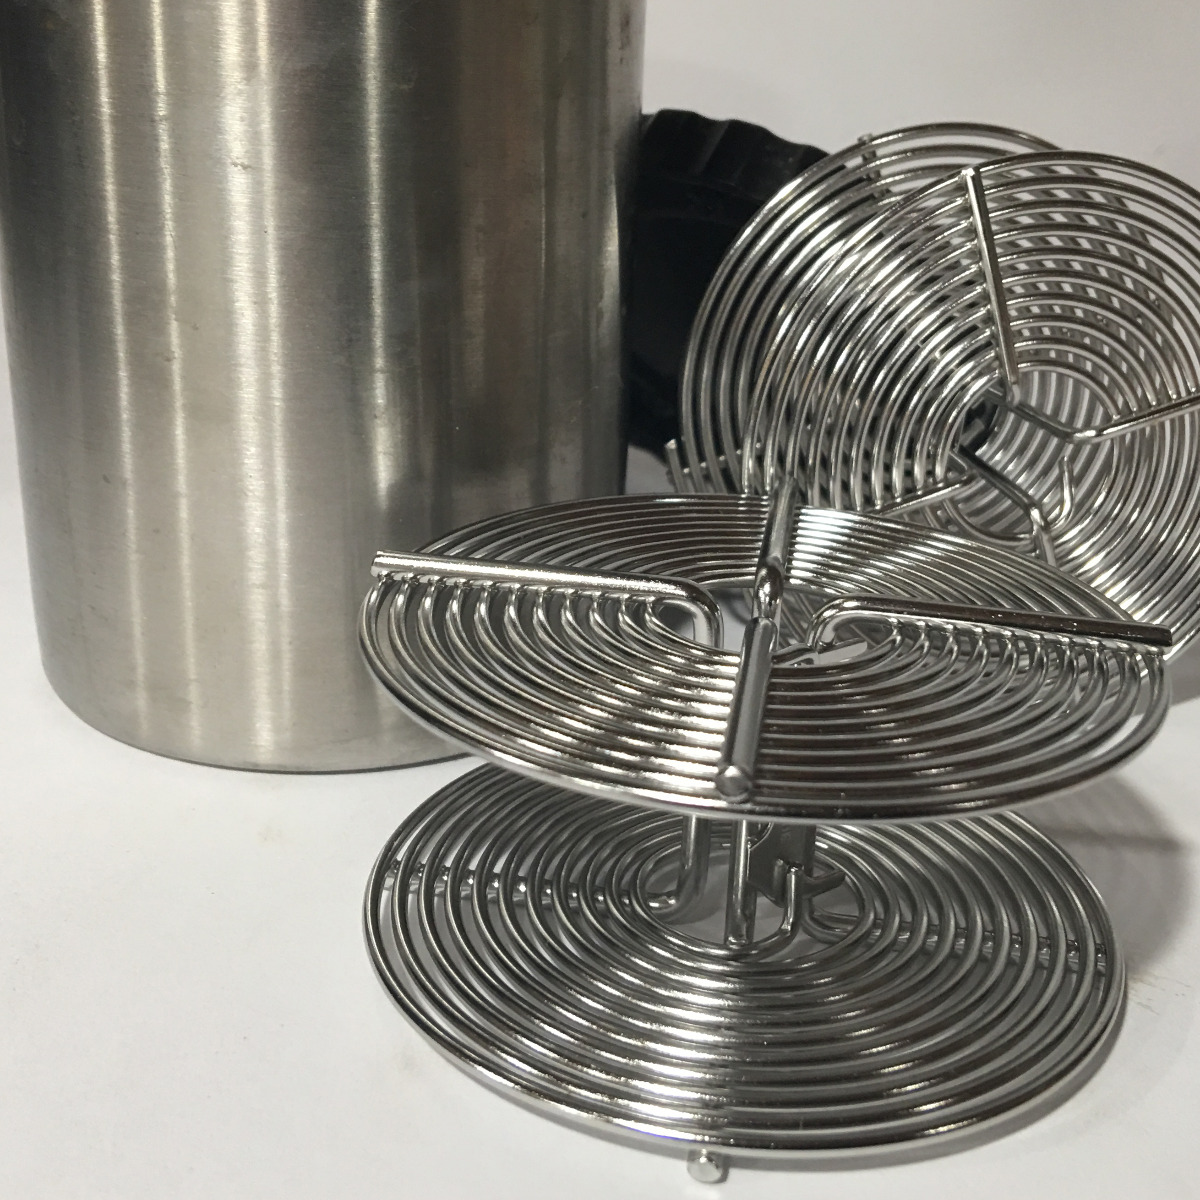
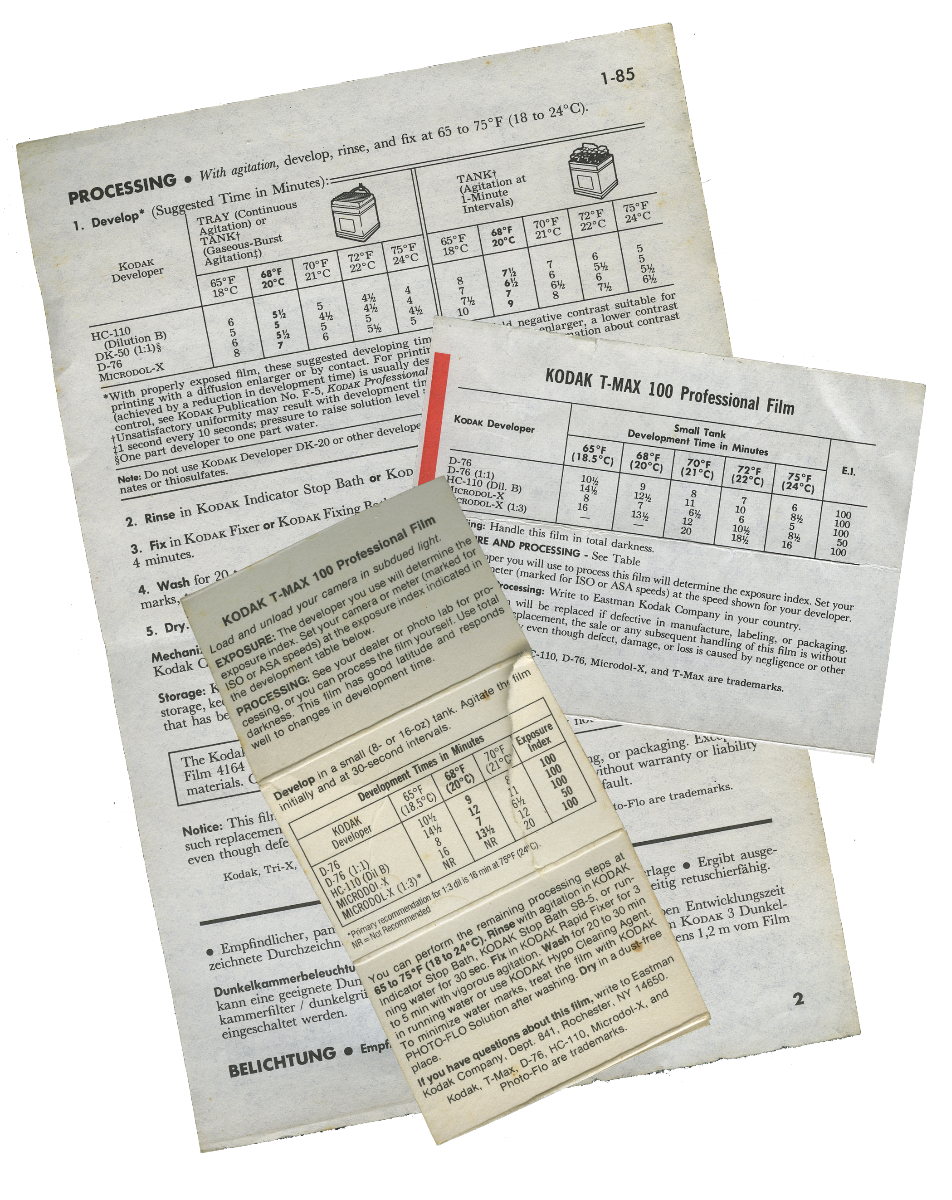
That being said, let's take a moment to reminisce a little bit and remind ourselves about the processing of silver gelatin film. Remember what that was like? The good old days of processing b/w roll film at home and making a closet or bathroom double as a darkroom? When you'd collect a drawer full of peeled apart film boxes with processing instructions printed on the inside; with the cardinal rule of time and temperature clearly spelled out for each developer in tabular form. With the lights out, you'd use a bottle opener to flip open a film cassette, then spool the film onto a reel, drop it into a processing tank and seal it with a lid to keep the light out. At that point the room lights could finally be flipped back on. From here on out, development was done strictly by the numbers: Time and Temperature - and no peeking! |
|
|
|
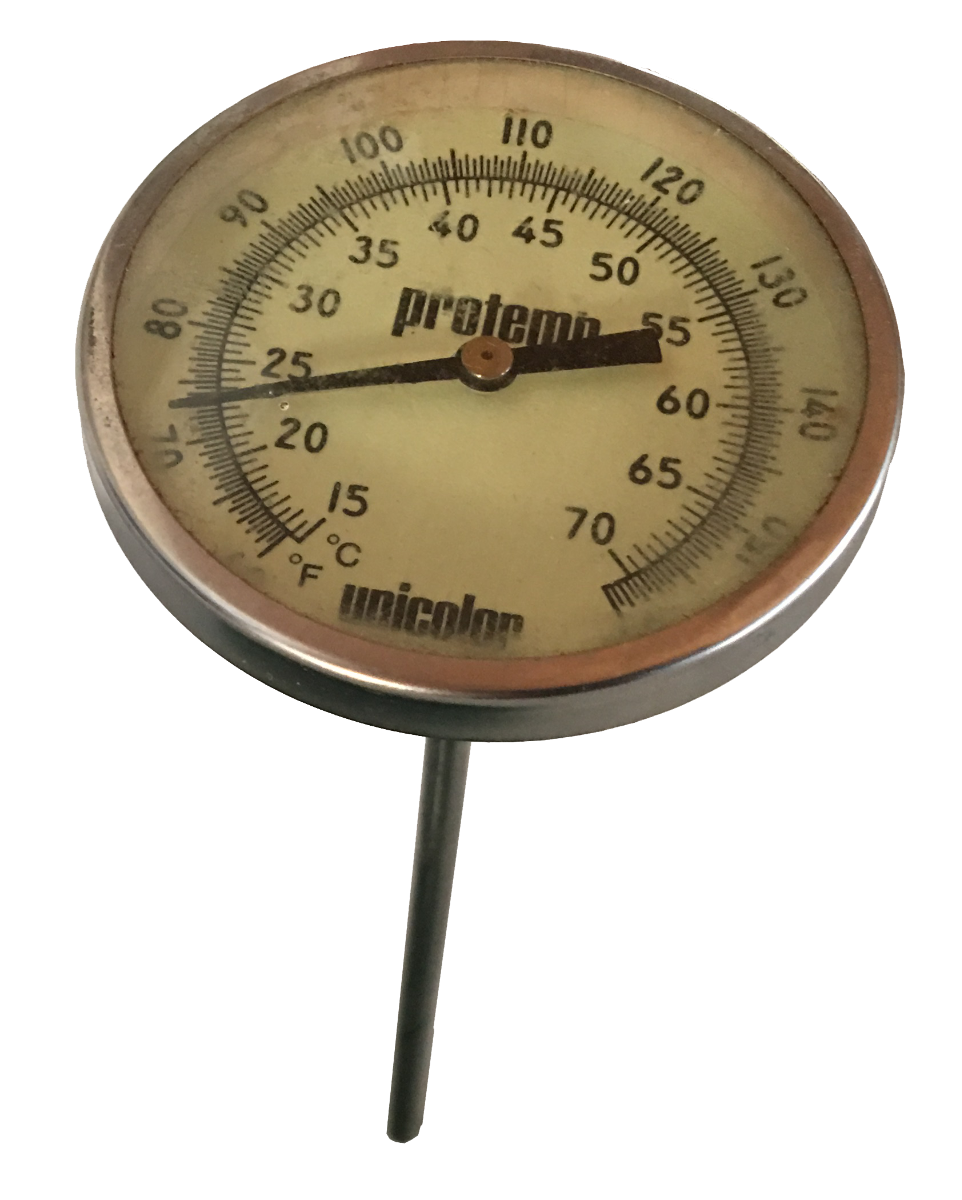
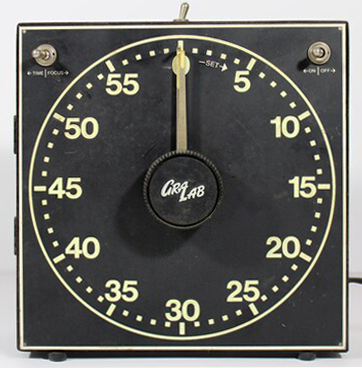
You'd mix the developer, hang a thermometer on the edge of the pitcher and use a water bath to bring it to 68F. At that point, you'd pour the developer into the tank and start the timer: along with the thermometer, these were the two most important tools in every darkroom. For the next 9 minutes, each time the glowing second hand swept past the top and bottom of the arc, you'd invert the tank a couple of times for agitation, and when the time was up, you'd dump the tank and pour in the stop bath to immediately stop development. Only after the film was treated with fixer would you then open the tank to inspect the results. |
|
Do you remember the first phrase that came to mind after unspooling the wet strip of film from the reel and discovering the image density wasn't what you'd expected? No, not that phrase...the other one.... "My film is over exposed!" or "My film is under exposed". In either case the reference was always regarding film exposure - the thought "My film is under (or over) developed!" never entered your mind! That just sounds weird!
Why, then, was exposure chosen as the variable to blame everything on? The short answer is because, in practice, it's the easiest one to change, and thus, the easiest one that alters the overall image density. Changing the exposure is easily accomplished by adjusting the exposure time (shutter speed) and/or the lens aperture.
Wait! We're not done yet. There's a little more to this story of development...
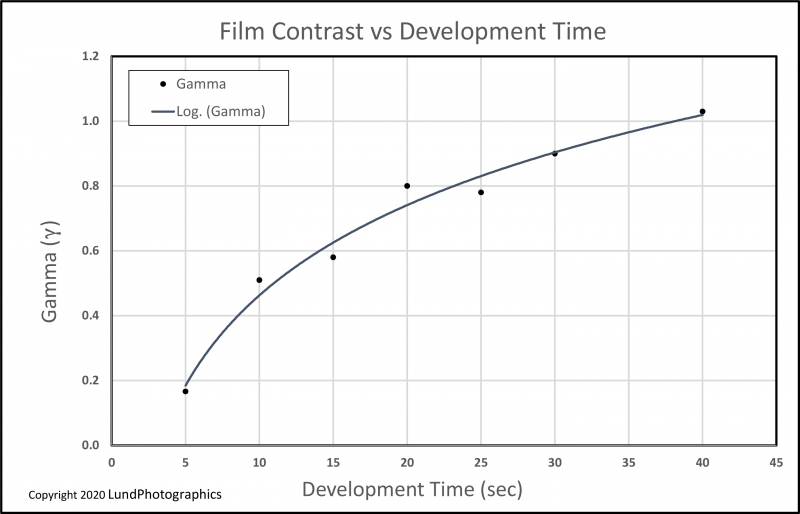
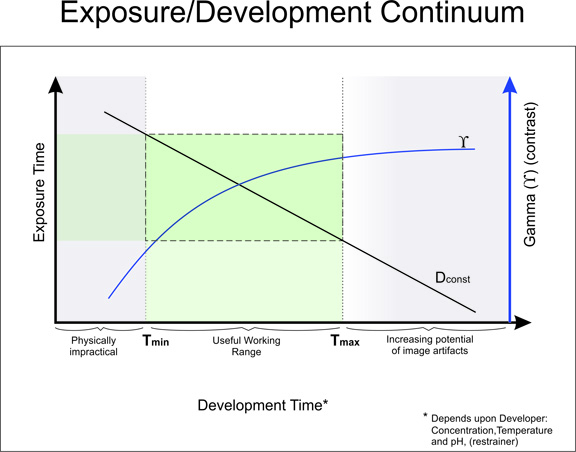
In addition to monkeying around with exposure time, we might also consider changing up the development time. But why would we do this? As it turns out, development time is the knob for controlling image contrast. Shorter development times result in images with lower contrast than those developed for longer times. Cool! Another tool!
But not so fast! There's a catch... changing development time not only affects contrast, but it also changes image density. Doh! Now we have one control knob (development time), that's affecting both contrast and image density. How do we untangle that mess? Before we can start changing up development time all willy-nilly like, we have a little more work to do. But more on that later...
Remember the old adage "Expose for the shadows and develop for contrast." Yup. It holds true for wet plate photography as much as it did for silver gelatine roll film. If we break it down, "expose for the shadows" insures that we have enough light reaching the film to record detail in those areas of the image that receive the least amount of light, while "Develop for contrast" is a secondary operation that influences the slope of the contrast curve.
So how do we implement these controls in wet plate?
To make the first part of the adage "Expose for the shadows" work, we need to ensure all of the variables in the development side of the equation are nailed down. What are those variables? I'm glad you asked! They are: development time, developer temperature, developer concentration, developer pH. Each one of these needs to be held constant (or as constant as practically possible). Developer time is the easy one - all we need for this is a timer or metronome. We're at the mercy of the elements regarding developer temperature since we're dealing with small quantities of liquid spread thinly on the surface of a plate. The developer temperature is likely to be whatever the ambient temperature is, maybe a little lower because of the effects of evaporation. The best we can do for this is to work in an environment with consistent temperatures. Developer concentration and pH are determined by the developer "recipe". If you're mixing your own (and it's simple to do!) you have complete control over the concentration and pH and you can be assured that these parameters remain constant. If you prefer to buy your developer pre mixed from someone else, stick with one supplier and hope they're being careful in their preparations.
Once we've decided on the developer we're going to use, the next step is to determine an appropriate "middle of the road" development time. To accomplish this, we first need to determine the upper and lower limits for development time. These values will likely be different for tintypes and ambrotypes. You'll need to experiment on your own to know what they are for the specific materials you're using. This is important: your materials aren't coming with pre printed data sheets and look-up tables printed on the inside of the carton - you're responsible for making your own.
The details...
Finding the lower limit on development time is easy: this depends on your ability to quickly and smoothly flow the developer across the plate to provide sufficiently even development across the entire image. This minimum development time is usually around 8 seconds if you're practiced in the art.
The upper limit for development time is a little fuzzier. In my experience, if we're using a 5% ferrous sulfate developer, it's typically around 30 seconds for tintypes and about 40 to 50 seconds for ambrotypes. To find this upper limit experimentally, pour salted collodion on a plate, and sensitize it in the usual manner. Don't bother to shoot an image, just go straight to development. Start with a development time of 15 seconds as a control. After fixing, this plate should be pure black. Repeat this test, but this time increase the development time by 10 seconds. Inspect the fixed plate for any kind of fogging, speckles, or anything else that makes the plate less than pure black. If the plate is still pure black, repeat the test and add another 10 seconds to the development time. When you finally begin to see fogging or speckles, or anything other than pure black, you've reached the upper limit on development time. If you shoot on glass, you'll need to repeat these tests for glass as well.
Once you know the upper and lower limits for your development times, pick a time midway between these two limits and stick with it. This will be your "carved in stone" development time. Until you become comfortable with the process and understand the ramifications of changing this development time, don't deviate from it. Time your development with a metronome and stop development when the time is up, regardless of what you see on the plate. I know it's tempting to "wait for the image to come up" but don't. Remember the lessons we learned from roll film processing? If the image doesn't come up in time, it's an exposure problem and not a development problem. Change the exposure to meet the appropriate development time.
|
Now, how do we find an appropriate exposure time? The most efficient way to accomplish this is to, make an in-camera test strip. This is a single plate with 5 strips, each representing a 1 stop difference in exposure compared to it's neighbor. (See our post on making in-camera test strips for more details). Process this plate using your predetermined development time. Don't forget to use a timer or metronome to time the development precisely! Stop the development when the time is up. Period. Don't look at the image at all, just follow the timer (remember your roll film processing?). Fix and rinse the plate then allow it to dry completely before making any value judgements (collodion plates have a nasty habit of drying up in brightness more than you'd expect!). |
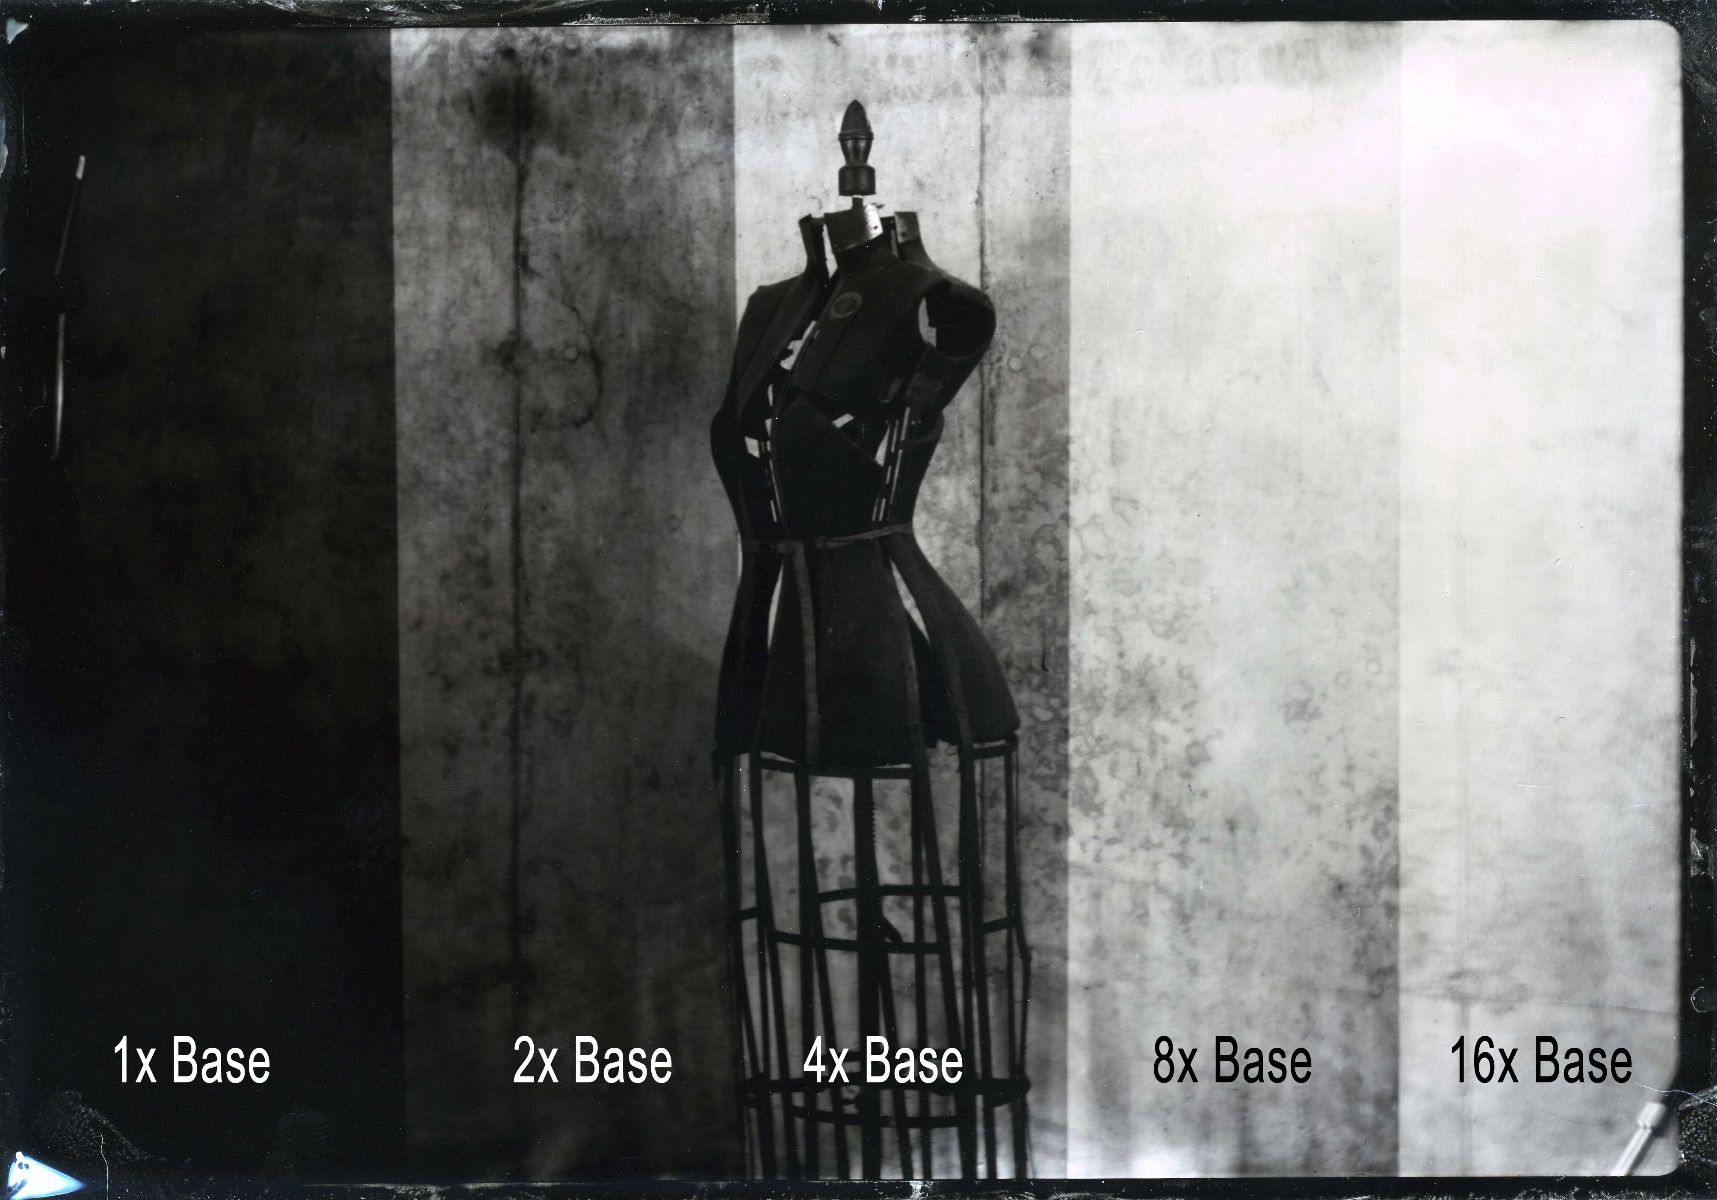
Look at the various strips on the test plate and decide which one is appropriate and/or if the proper exposure might be between strips. If the proper value is outside the range captured on the test plate, make a new plate with an increased or decreased base exposure value. Write the exposure times for each strip, and the EV value (from your light meter) of the scene on the back of the plate. (See our post regarding the use of light meters with collodion photography for more details). Once you've determined an appropriate exposure time for that scene, shoot an entire plate and inspect the image for proper exposure. If all looks good, you've calibrated your exposure time to your development time. Now all you need to do is meter your next scene and adjust your exposure (in stops) based on the difference in EV values from the previous shot.
To make the "develop for contrast" part work, you'll need to run a few more tests. This usually works best when using a simple still life scene, one that includes smooth midtones. Avoid setting up a scene that's busy or geometrically complicated as this may mask the changes in contrast that you're hoping to illustrate. Construct the scene indoors away from natural lighting and illuminate the scene with an artificial light source. This gives you repeatability and eliminates the variability inherent with the ever changing intensity of natural lighting. When you run this test, you're going to make three plates: a control image with "normal" contrast, a low contrast image, and a high contrast image.
To make the "normal" contrast control image, use the standard "carved in stone" development time that you found earlier. Shoot a test plate to determine the proper exposure for this development time. Once you've nailed the exposure time, shoot a full plate. Fix, wash and dry this plate, then write the exposure and development details on the back.
To make the low contrast plate, chose a developing time near the lower limit of your development time window. Shoot a test plate or two to determine the appropriate exposure time for that development time. Once you've gotten this exposure time nailed, shoot a full plate. Write the exposure and development details on the back of the plate.
To make the high contrast plate, choose a development time near the upper limit of your development time window. Shoot a test plate or two to determine the appropriate exposure time for that development time. Once you've gotten this exposure time nailed, shoot a full plate. Write the exposure and development details on the back of the plate.
Once all of your plates have been processed and are completely dry, lay the images side by side with the shortest development time on the left and the longest development time on the right. Pay attention to the difference in contrast between these images. This is the amount of control you have over image contrast. Save these plates as reference images that link your development time to image contrast.
Now when you approach a new scene, think about the contrast you'd like to have in the final image. Is the scene a little flat? If so, you might want to enhance the contrast by developing a little longer. Is the scene a little contrasty? Then you might want to decrease development time to compensate. It's all a judgement call, but now you at least have a consistent and reliable tool in your bag of tricks that you can use with proper intent.
Remember: Our goal is to control the process, not to let the process control us!