Making In-Camera Test Plates
Making In-Camera Test Plates
You’ve set up for the first time in a new lighting condition, and you're not quite sure what the correct exposure should be. Your gut response might be to rely on past experience, judge the light level by eye and guesstimate an exposure. Sometimes this works, but the eye is a notoriously poor tool for measuring absolute light intensity, particularly in the UV portion of the spectrum. The option I prefer is to shoot a test strip as my first plate. But what makes a good test strip? Ideally, a good test strip will produce intervals of exposure that increment in steps of one stop. You might be asking “why not just increment the test plate in uniform steps of one or two seconds?”. The answer to this lies in the fact that film responds exponentially to exposure and not linearly. Had we opted for making a test strip with a linear progression of exposures (1 second, 2 seconds, 3 seconds...and so on) we’d find the brightness intervals in the print becoming compressed, with smaller differences in brightness occurring between, say, 5 and 6 seconds than what we’d find between 1 and 2 seconds. A second problem with the linear progression is that it covers only a small range of exposures as compared to a test plate that uses intervals of one stop.
That said, here’s how to make a test strip with 1 stop intervals.
Initial Preparation:
Start by marking some lines on the back of your dark slide. With the dark slide fully closed, draw a line across the dark slide at the top edge of the plate holder. Next slide the dark slide open to the point where it just begins to show in the front opening of the plate holder and draw a second line across the dark slide at the top edge of the plate holder. Remove the dark slide completely and measure the distance between these two lines. Divide this distance into 5 equal segments and draw lines across the dark slide at these locations.
Making the exposure:
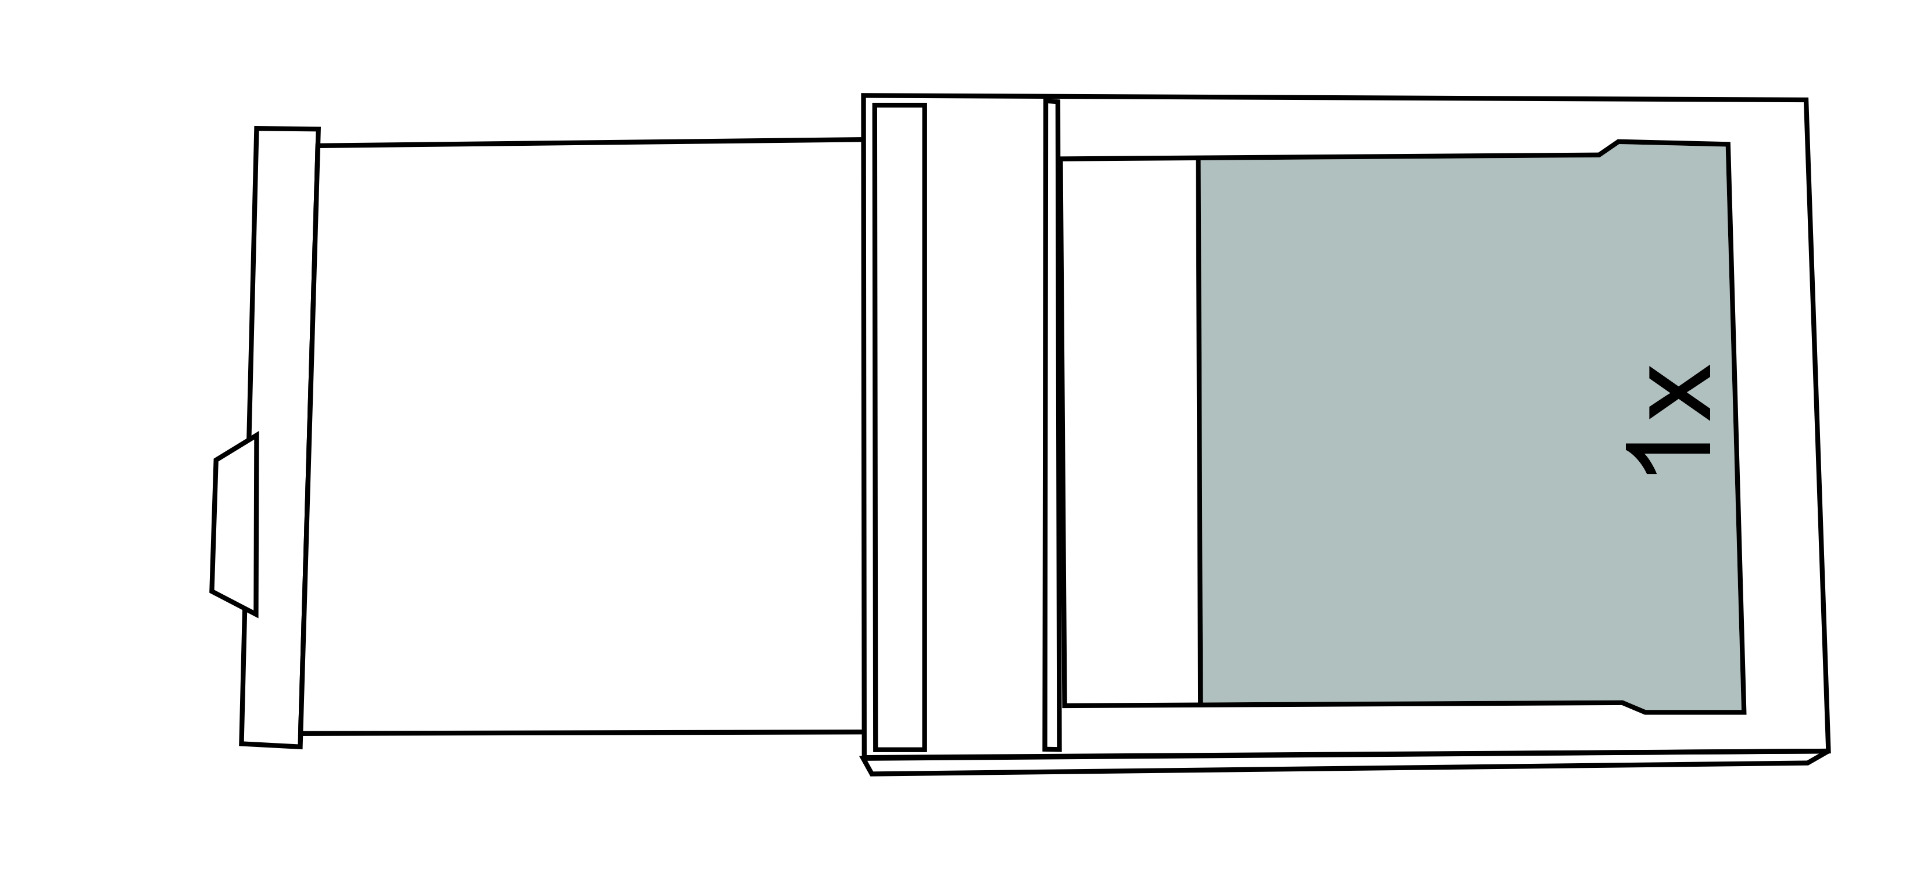
Position the dark slide so that the first line is even with the top of the plate holder.
Expose the entire plate for some short amount of time (this depends upon the lighting conditions and the f/stop used. For f/8 in open shade, try starting with 3 seconds). We’ll call this the base exposure.
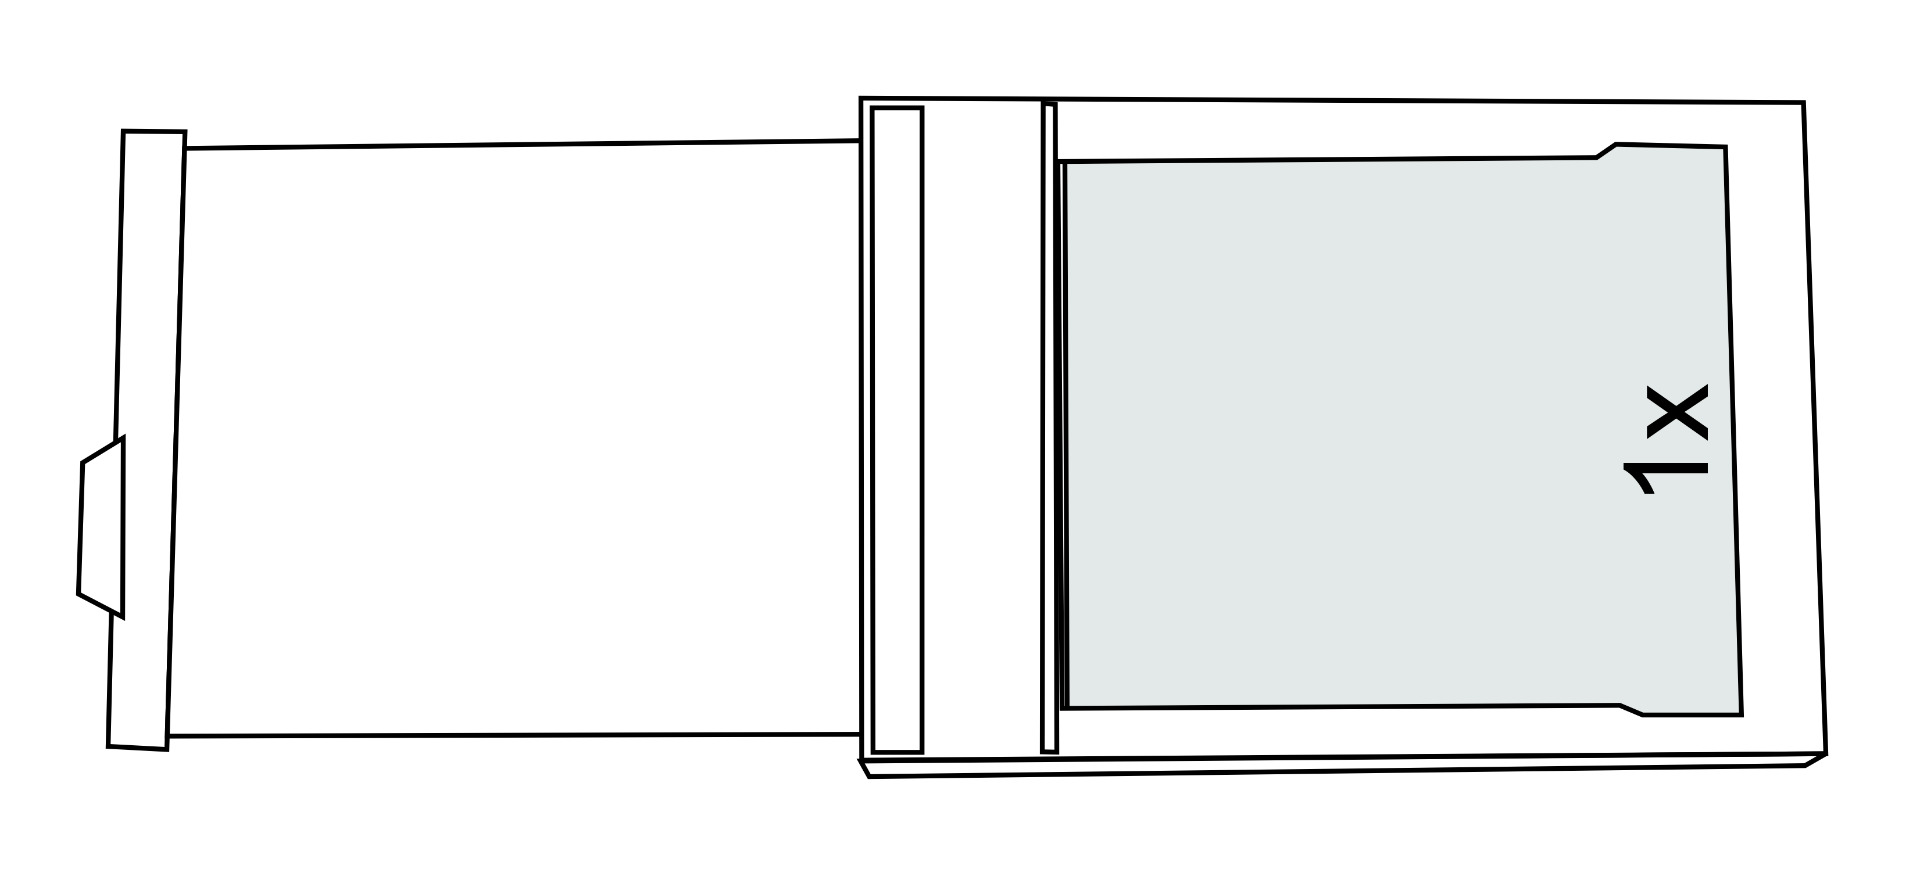
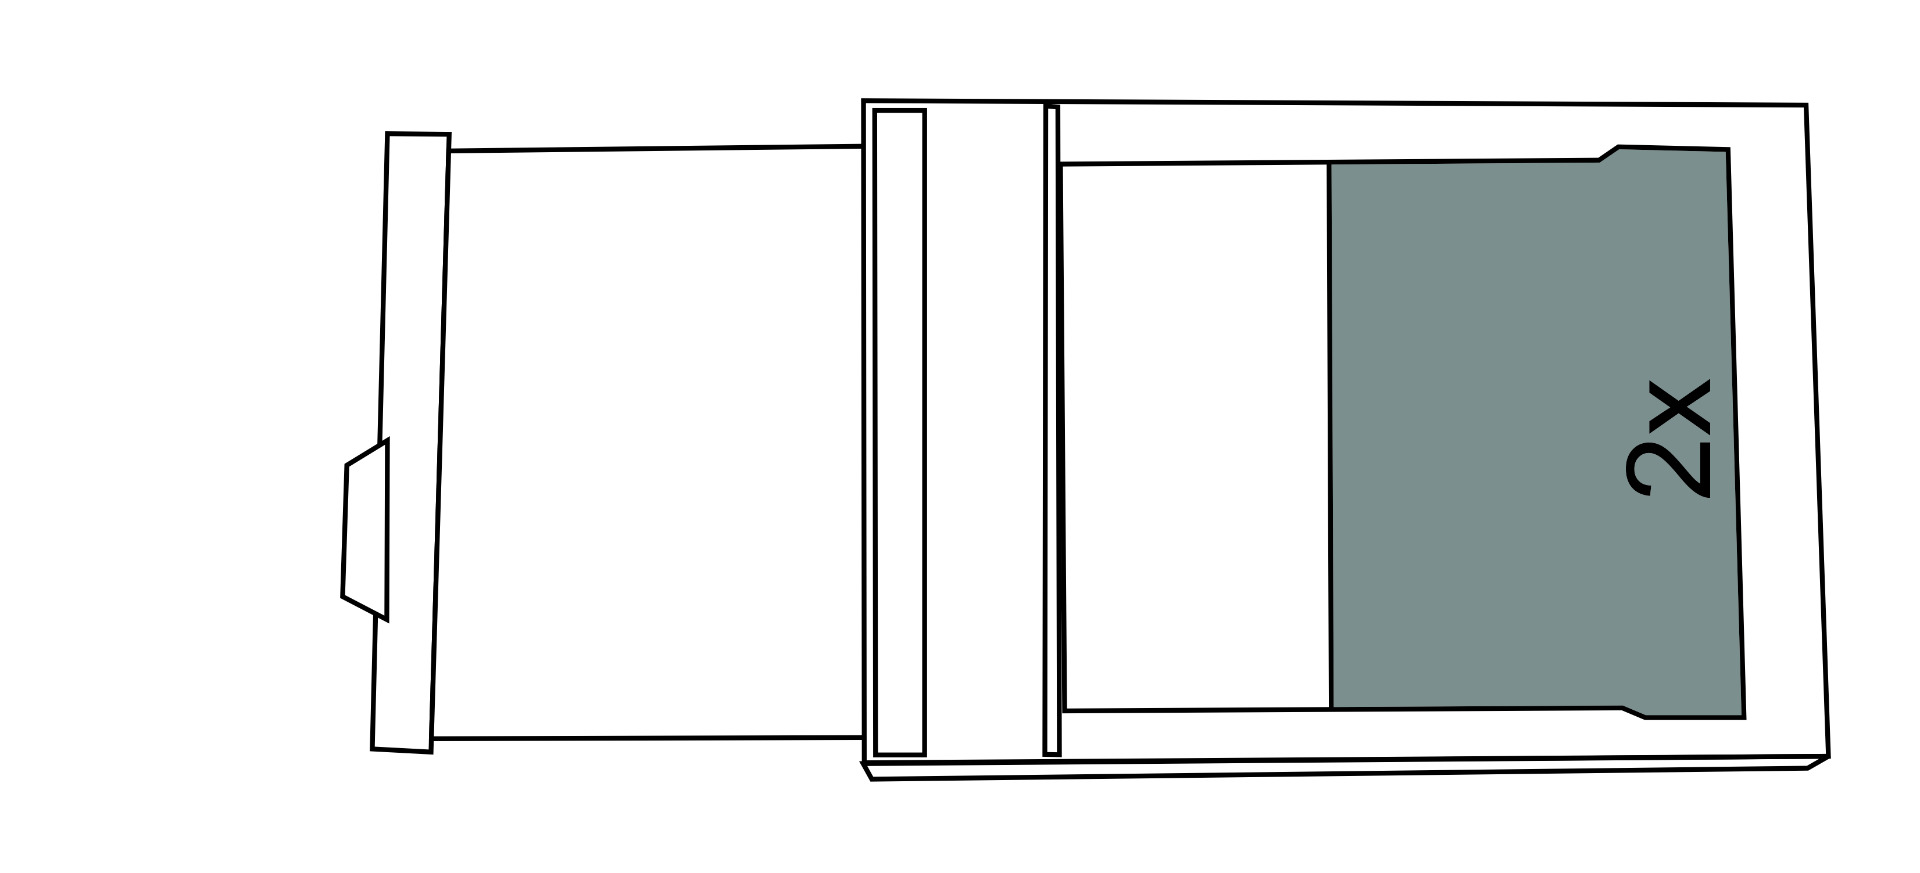
Next, push the dark slide in to the second mark and expose again for the same amount of time.
Push the dark slide in to the third mark and expose again for 2x the original base exposure.
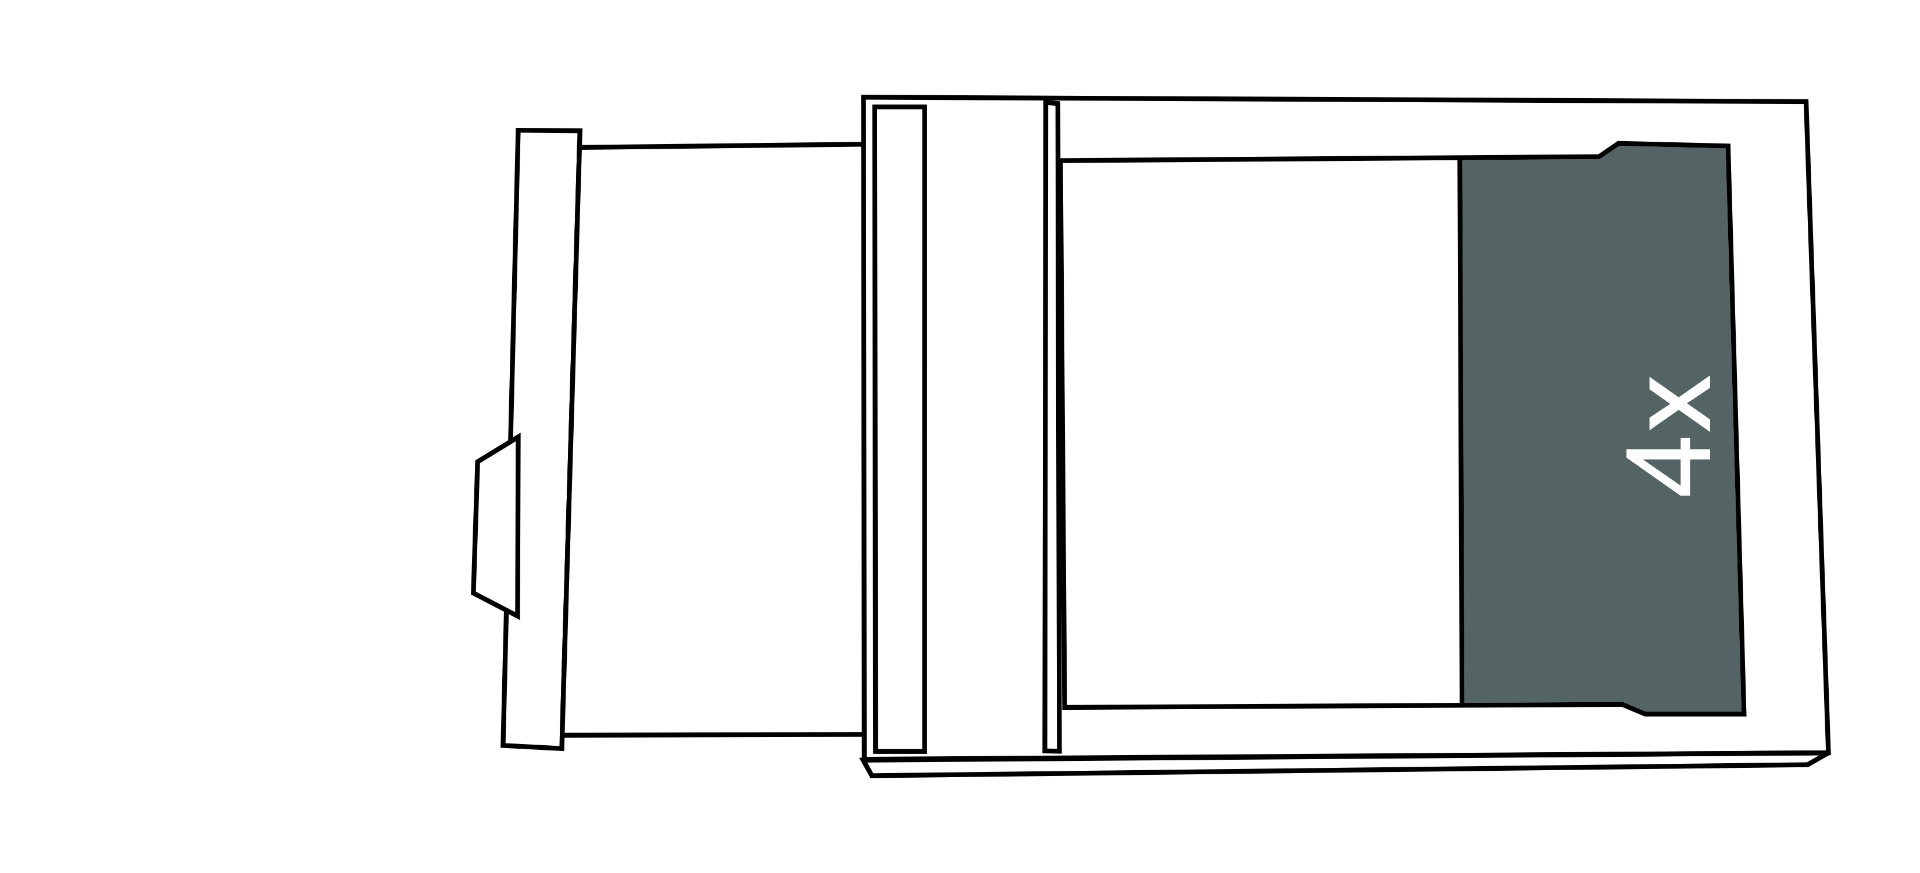
Push the dark slide in to the next reference line. Expose again for 4x the base exposure.
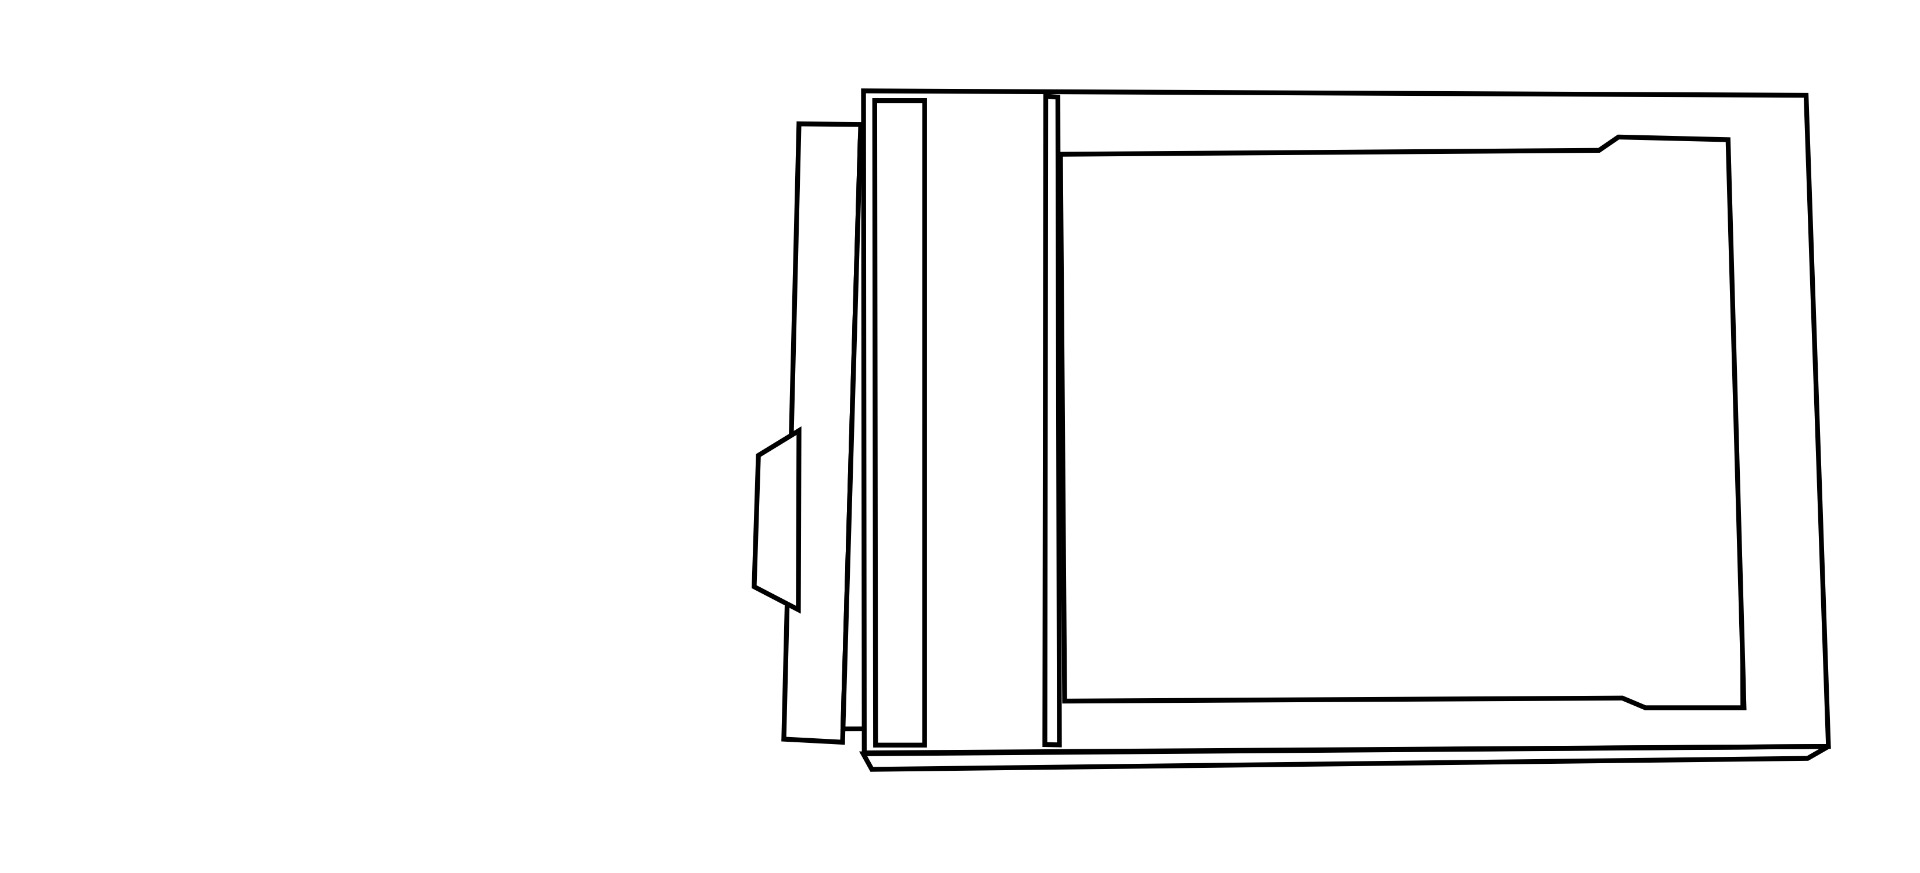
Slide the dark slide in to the last next reference line.
Expose again for 8x the base exposure.

Close the dark slide completely.
This will give you total exposures on the collodion of 1x, 2x, 4x, 8x, and 16x the base exposure. In other words, 5 exposures separated by one-stop intervals. Develop and fix the plate as you would normally. Dry the plate, and inspect the image for an appropriate exposure. Given that the intervals are in one stop increments, intermediate exposure values are easy to estimate.
I encourage you to use this technique if you're setting up the first shot of the day, using a camera you're unfamiliar with, trying out a new lens, or working in unfamiliar lighting conditions.