Trouble Shooting Tin
When one encounters a "tin artifact" or a pattern of unidirectional streaks or spots in an image, the first reaction you might have is to chuck your hands in the air and blame the tin. While that may feel temporarily satisfying, it doesn't actully solve any problems, and we all know large part of wet plate photography is about trouble shooting and problem solving. So, to help you out, we're going to give you some tips and techniques to make the trouble shooting process a little easier.
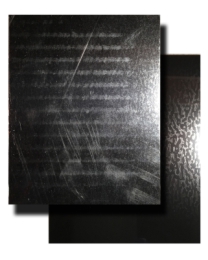 |
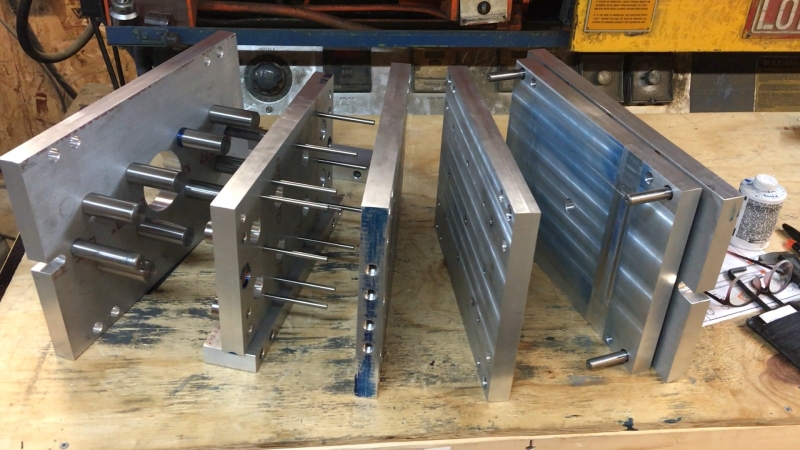
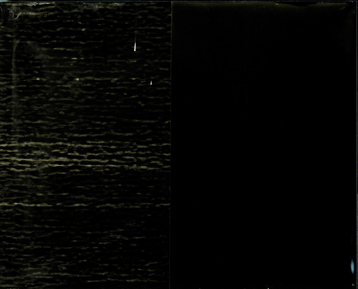
My first goal is to remind you that coated aluminum is an industrial product that has no relationship to photography whatsoever. The manufacturers of this material don't care a fig if it's good for imaging or not. We, as photographers, have adopted coated aluminum and like using it because it's a heck of a lot easier to manage and quicker to use than japanning our own plates. But, occasionally, things don't work as planned, stuff happens, and because of this, we need to stay sharp to identify and troubleshoot problems as they occur. My larger goal here is to help you identify what a "tin artifact" looks like and show you how easy it is to solve. I'll also demonstrate that even tin as ugly as that shown here (which, by the way, is some of the ugliest I could find!) can produce exceptional images and that the problem lies not with the tin itself but in the processing techniques used to prepare the tin, as well as improperly controlled variables in processing. Referring to the photo, the sheet on the left has the plastic coating in place, while the sheet on the right has the plastic coating removed. The following example photographs were produced using this same "ugly tin". |
So, what is a "tin artifact"? Generally speaking, it appears as a regular pattern of spots or streaks, usually aligned with one edge of the plate, and mostly visible in the shadow areas of an image. In lesser forms it show up as "noise" in the shadow areas, preventing you from obtaining good clear blacks in an image. And what are some of the factors responsible for these noisy shadow areas, spots, and streaks? They are caused by, or exasperated by, inadequately cleaned plates, excessive development times, and/or the use of improperly ripened collodion. It's important to realize that tin related artifacts do not occur in isolation, and are usually a combination of the factors listed above. |
And ultimately, what can be done to make these artifacts vanish? |
 |
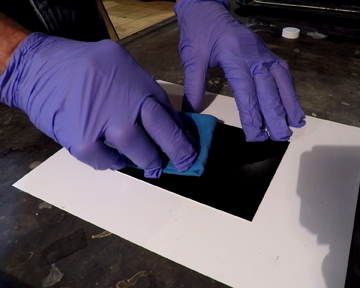 |
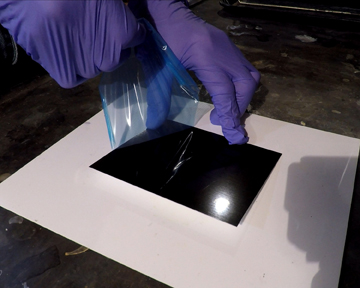
Your first line of defense (and this is a proactive step), is to make sure your plates are clean. If you encounter a regular pattern of streaking on the plate and suspect there may be residue left over after removing the protective plastic coating, clean the surface of the plate by wiping it down with alcohol and a microfiber cloth prior to applying collodion. Easy peasy and extremely effective. I would recommend making this step part of your normal process: very little effort, extremely large payoff. |
 |
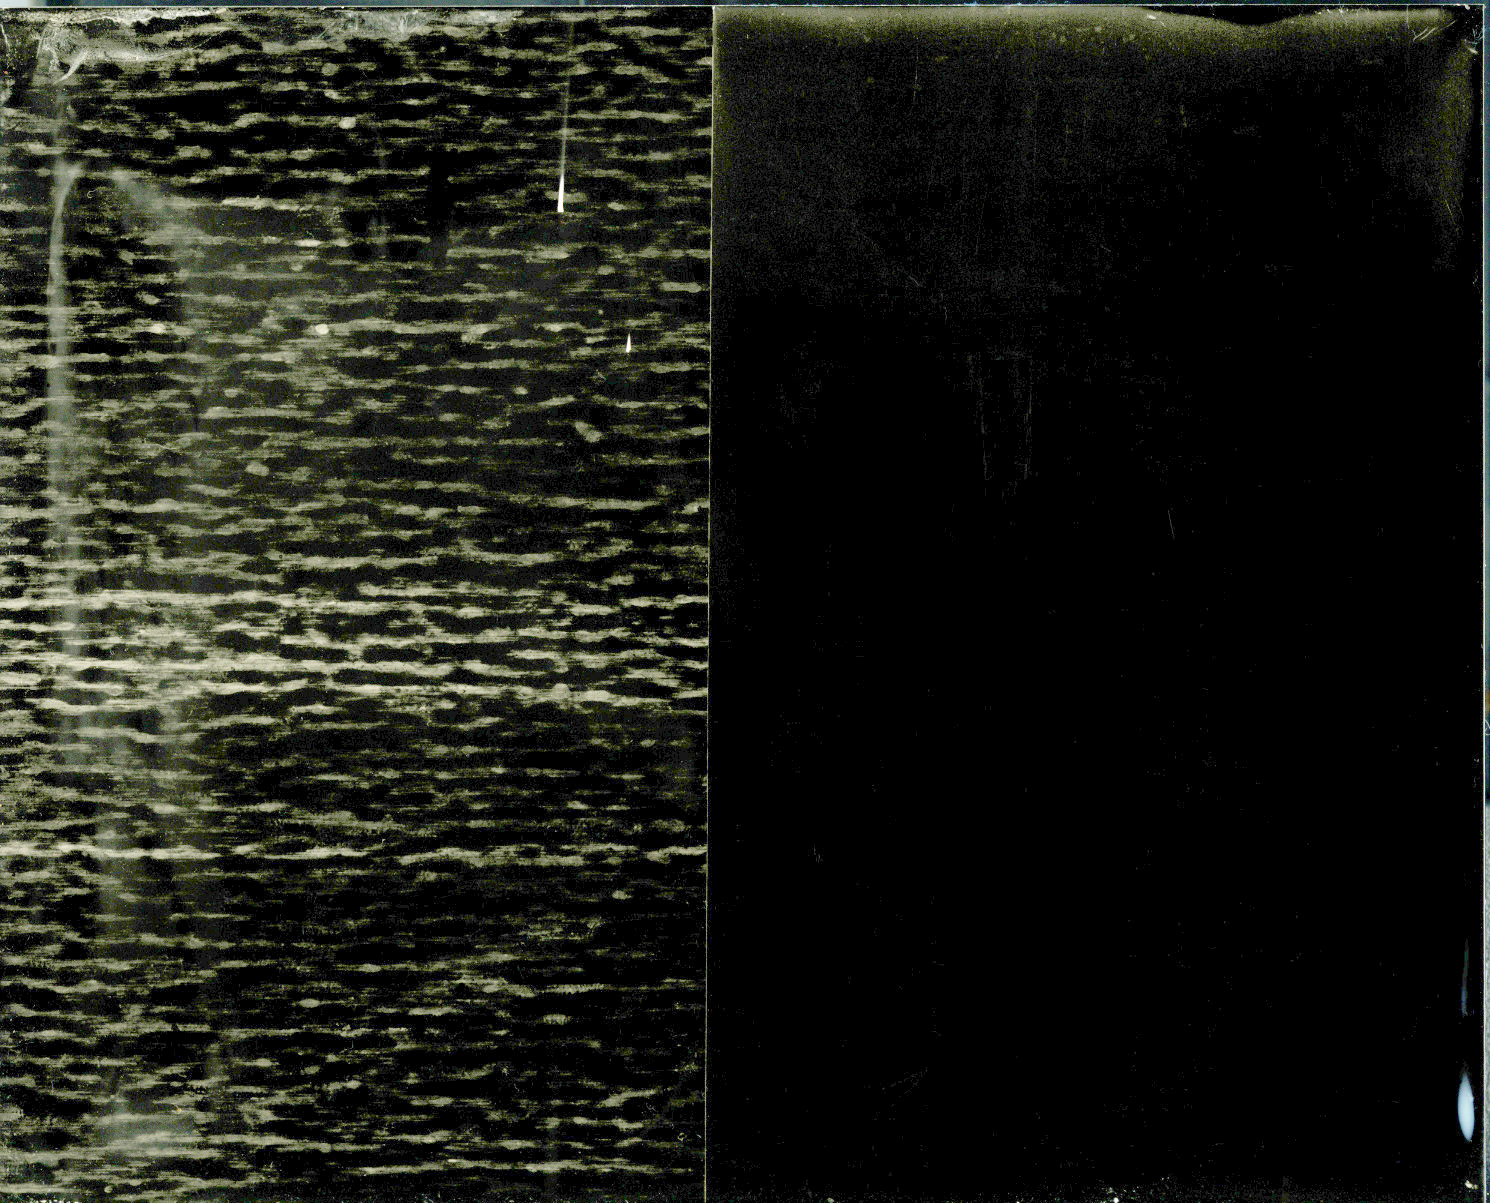
To demonstrate its effectiveness, here are the results of cleaning the plate prior to pouring the collodion. The left half of the image shows what can happen if you don't clean the plate, and the right half of the image is what you get if you do clean the plate. You be the judge. |
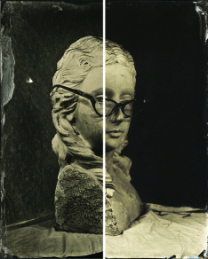 |
If, in the unlikely event, you're still encountering noise in the shadow areas, you may want to reduce development time to the neighborhood of 15 to 20 seconds In the experiments we've conducted, 15 seconds of development using a 5% ferrous sulfate developer works well. Monitor development time using a metronome for consistency. Stop development at the completion of the development time regardless of what your see on the plate. If the resulting image density is inappropriate, correct this through exposure, not by altering development times. To illustrate the effect of exposure and development on spots and streaks in the image, consider the photo to the left. The right side of the image is clean, with clear blacks in the background, while the black background of the left side of the image is marred with spots and streaks. “So what could possibly cause such a dramatic difference in the images?”, you might be asking yourself (and if you’re not, you should be!). The difference here lies in the development time. The image on the left had a 5 second exposure with 40 seconds of development while the image on the right was given a 20sec exposure with 15 seconds of development using a 5% ferrous sulfate developer. All other variables were held constant. |
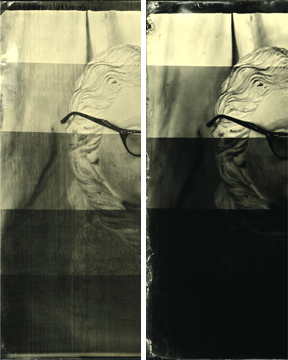 |
Lastly, insure that your collodion has been properly ripened before using it. As collodion ages, small amounts of iodine are released into solution, producing the characteristic amber color we're all familiar with. It also increases the acidity of the collodion, improving it's resistance to fogging and other artifacts. This ripening time varies depending on the formula used, but a reasonable average for ripening is approximately 3 weeks. If you intend to use collodion that's insufficiently ripened, the process can be artificially accelerated by adding tincture of iodine to the collodion at a rate of 3 to 4 drops per 30 ml (1 ounce). This comparision image illustrates the relationship between unripened collodion and spots and streaks in the image. The image on the left was made using newly mixed collodion that had not been allowed to ripen sufficiently. The image on the right was made using the same collodion and the same tin, but 4 drops tincture of iodine was added per ounce of collodion to artificially accelerate the ripening process. The addition of iodine affects the image in a few ways: it increases the image contrast, reduces unwanted noise in the shadow areas, and slows the "speed" of the collodion (which in turn requires longer exposure times). |